
How to Move to iPhone from Android: A Seamless Guide
Making the switch from Android to iPhone? You'll be happy to know it's much less of a headache than it used to be. Thanks to Apple's own Move to iOS app and Google’s powerful cloud services, most of the heavy lifting is done for you. The whole process really just comes down to backing up your Android data, using the app to transfer the important stuff, and signing into your accounts on your new iPhone.
This guide will walk you through it step-by-step, ensuring all your contacts, photos, and messages are waiting for you on your new device.
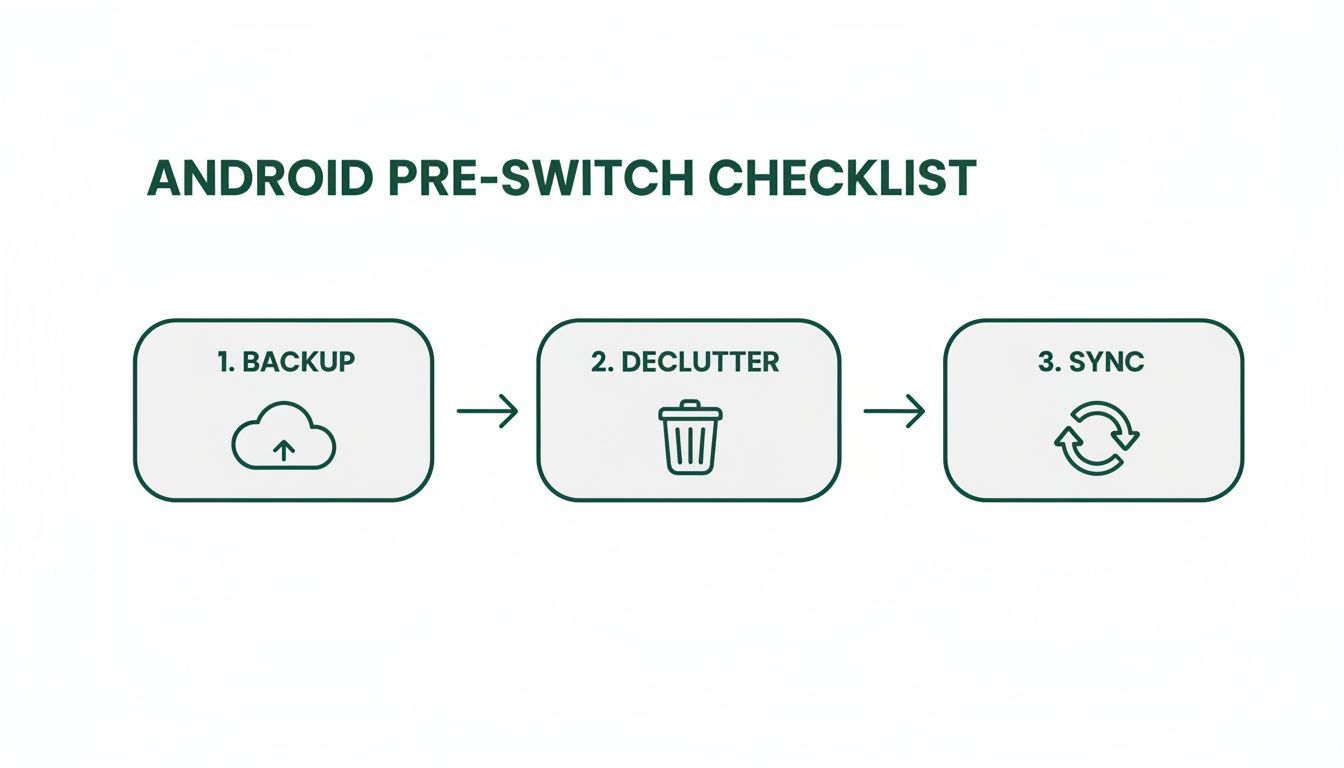
Your Pre-Switch Android Checklist
Before you tear open the box of your shiny new iPhone, spending a little time getting your Android phone in order will save you a world of pain later. Think of it as a pre-flight check before take-off. A smooth transition all starts with organising your digital life on the old phone first, making sure nothing important gets left behind.
This isn't just about dragging files from one place to another; it's about giving yourself a clean, organised start on your new device. A few key steps now will make the actual transfer much faster and far more reliable.
Create a Complete Backup with Google One
First things first: back up everything. Your photos, contacts, app data, and settings are invaluable, and Google One provides a straightforward way to create a digital safety net for it all. It gathers all your important information into one secure spot in the cloud.
Most modern Android devices have this built right in. Just head into your phone's settings, find the "Google" section, and tap "Backup." From there, you can kick off a backup to Google One. You get a generous amount of free storage, which is often more than enough.
This visual from Google gives you a good idea of what it looks like—one simple dashboard for your phone data, photos, and files. Once this is done, you can relax knowing you have a full, recoverable copy of your Android life before you even start the migration.
Declutter Your Device for a Faster Transfer
This is the perfect opportunity for a digital spring clean. A phone crammed with old apps and files doesn't just feel messy; it can seriously slow down the transfer process. The logic is simple: the more data you have, the longer it takes to move.
Start by deleting apps you haven't touched in months. Next, dive into your photo gallery and downloads folder to get rid of blurry photos, old screenshots, and forgotten files that are just eating up space. For a more detailed guide, check out our post on what to do before selling your Android phone, as many of the same tips apply here.
A leaner device is a faster device to migrate. Aim to clear out at least a few gigabytes of unnecessary data—you'll be surprised how much quicker the transfer will be.
Sync Your Contacts and Calendars
By far the easiest way to bring your contacts and calendar appointments across is to make sure they're synced with your Google Account. Think of your Google Account as a universal bridge connecting the Android and iOS worlds.
- Check Your Contacts Sync: Pop open the Contacts app on your Android, dive into its settings, and make sure it’s syncing everything to your main Google Account.
- Verify Your Calendar: Do the same thing in your Calendar app. You want to ensure all your appointments are linked to your Google calendar, not a local "phone-only" one that won't transfer.
Once this is all synced up, your contacts and events will magically appear on your iPhone the moment you sign in with your Google Account. It's one of the most seamless parts of the whole process.
After you've successfully moved everything over, the final step is to handle your old Android phone responsibly. To make sure your data is wiped clean and the device is disposed of correctly, it's worth learning how to dispose of a cell phone securely.
Using Apple’s Move to iOS App
If you're looking for the most straightforward, Apple-approved way to get your data across, the free ‘Move to iOS’ app is your best bet. Think of it as a dedicated moving service for your digital life, designed by Apple to bridge the gap between Android and your new iPhone as smoothly as possible.
The app creates a temporary, private Wi-Fi network between the two phones. This is a crucial detail because it means your contacts, photos, and messages are transferred directly and securely, without ever being uploaded to the internet. The whole process happens during the initial setup of your new iPhone, so it's something you'll want to be ready for right out of the box.
Getting Started with the Transfer
First things first, you'll need to head over to the Google Play Store on your old Android phone and download the ‘Move to iOS’ app. It's a good idea to do this before you even unbox your new iPhone, just to have everything lined up and ready to go.
When you power on your new iPhone for the first time, follow the on-screen setup prompts. You’ll eventually land on a screen titled "Apps & Data." This is the key step. Look for the option that says "Move Data from Android."
Tap that, and your iPhone will display a six or ten-digit code. Now, open the Move to iOS app on your Android phone, agree to the terms, and enter the code when prompted. This is the digital handshake that connects the two devices.
What Data Makes the Journey
Once the phones are connected, your Android will ask you what you want to bring over. You’ll see a list of data categories, and you can tick the boxes for everything you want to transfer. For most people, this means selecting everything.
So, what exactly can the app handle? It's pretty comprehensive and covers most of the essentials.
Data Transferred Via Move to iOS App
Here’s a quick summary of what you can expect to be automatically transferred when using Apple's official migration app.
| Data Type | Transfer Support | Notes |
|---|---|---|
| Contacts | ✅ Yes | All contacts stored locally on your device or synced to your main account. |
| Message History | ✅ Yes | Your SMS and MMS conversations will be moved over. |
| Photos & Videos | ✅ Yes | Your entire camera roll, including photos and videos you've taken. |
| Mail Accounts | ✅ Yes | Settings for your primary email accounts are brought across. |
| Calendars | ✅ Yes | Appointments and events from your default calendar app. |
| Bookmarks | ✅ Yes | Your saved web links from your Android browser. |
| WhatsApp Data | ✅ Yes | Includes your chat history, photos, and voice messages. |
| Free Apps | ✅ Yes | The app identifies free apps that are available on both stores and suggests them for download. |
This process handles the heavy lifting, ensuring your most important information is waiting for you on your new iPhone.
Pro Tips for a Flawless Transfer
While the app does a great job, a few real-world tips can help you avoid common frustrations. This transfer isn't instant—it can take a while if you have years of photos and videos. Be patient.
The single biggest mistake people make is not plugging both phones into a power source. A battery dying mid-transfer can corrupt the data or force you to start the entire process over again.
Also, make sure you leave both phones alone until the transfer is complete. Don't be tempted to switch to another app or answer a call, as this can break the connection. It's also a smart move to temporarily turn off mobile data on your Android phone to prevent it from dropping the private Wi-Fi network the iPhone created.
By making the switch, you're in good company here in Australia. iOS has an incredibly high 85-88% user retention rate, and with 59% of the local smartphone market, you'll find it's a well-supported ecosystem. In fact, only about 12% of people who switch to iPhone ever decide to go back to Android. You can discover more insights about these mobile OS trends to see just why the move is so popular.
The Manual Transfer for Total Control
If you're the type who likes to be in the driver's seat, or if you're moving to a refurbished iPhone that's already been set up, the manual transfer is your best friend. This method gives you complete control over exactly what comes across to your new device.
Instead of a bulk migration, you’re basically just telling your new iPhone to sync with your Google account. It’s a hands-on process that’s perfect for anyone who wants to leave digital clutter behind on their old phone.
This is especially handy if you’ve picked up a verified refurbished iPhone from a marketplace like Trade.com.au. Since those devices often come updated and ready to go, you can skip the whole initial setup screen and dive straight into adding your accounts.
Syncing Your Core Data with Google
The heart of this method is making sure your most important info—contacts, calendars, and photos—is already synced to your Google Account before you even power on your new iPhone. This simple step makes everything accessible from anywhere.
First, take a moment to double-check the sync settings on your Android phone.
- For Contacts: Open your Contacts app, head into the settings, and confirm your contacts are being saved to your main Google Account, not just stored locally on the phone's memory.
- For Calendars: Do the same in your Calendar app. Make sure all your events are part of a Google calendar. Any calendars labelled "My Calendar" or "Phone" are often device-specific and won't make the jump.
- For Photos and Videos: Open the Google Photos app and check that "Backup" is switched on. You’ll want to let it finish uploading your entire camera roll. Google gives you a generous amount of free storage, which is usually more than enough for thousands of photos.
Once those three pillars of your digital life are safely in the cloud, you’ve done most of the heavy lifting.
Bringing Your Google Data to Your iPhone
Now, let's get that information onto your new iPhone. This part is surprisingly easy. You're not really "transferring" anything in the traditional sense; you're just logging in and giving your iPhone permission to display your data.
On your iPhone, go to Settings > Mail > Accounts > Add Account. From the list, tap Google and sign in with your usual username and password.
After signing in, your iPhone will ask which services you want to sync.
You'll see toggles for Mail, Contacts, Calendars, and Notes. Just make sure the switches for Contacts and Calendars are flicked on (they'll turn green). This tells your iPhone to pull that information directly from your Google Account and show it in the native Apple apps.
Within moments, you’ll see all your contacts appear in your phonebook and your appointments pop up in your calendar. For your photos, just download the Google Photos app from the App Store, sign in, and your entire library will be right there waiting for you.
Moving Other Files with Cloud Services
But what about other things like documents, PDFs, or music files? This is where cloud storage platforms like Google Drive, Dropbox, or Microsoft OneDrive become your digital moving boxes.
The process couldn't be simpler:
- On your Android phone, install your cloud storage app of choice (like Google Drive).
- Upload the specific folders or files you want to move—this could be a "Work Docs" folder or your downloaded music collection.
- On your new iPhone, download the exact same app from the App Store.
- Sign in, and all your files will be instantly accessible. From there, you can download them directly to your iPhone's local storage if you need them offline.
This method gives you complete oversight, ensuring only the files you truly want make their way onto your new device. It’s a clean, controlled way to complete your move to an iPhone.
Moving Your Apps and Conversations
Okay, so your contacts and photos are sorted, but let's be real—your digital life really lives in your apps and chat histories. This is often the part of the move that feels the trickiest because you're not just shifting files, you're transferring entire digital ecosystems.
We’ll break down exactly how to handle your apps and, most importantly for many Aussies, how to bring your precious WhatsApp conversations over with you.
Getting this right is a key part of the switch, making sure your day-to-day digital life doesn't get left behind on your old Android.
Sorting Out Your Apps
When you use the ‘Move to iOS’ app, it does something quite clever. It scans your Android for all your installed apps and then hunts them down on the Apple App Store. Any free apps available on both platforms—think Instagram, Spotify, or your banking app—get added to a download list on your new iPhone. Easy.
But there's a catch with paid apps. Since the Google Play Store and Apple App Store are completely separate shops, your purchases don't carry over. This means you'll likely need to repurchase any paid apps or games you want to keep. It's a bit like moving from a PlayStation to an Xbox; you have to buy the games again for the new console.
The trend of moving from Android to iPhone is booming in Australia, where there are now 26.2 million smartphone users. iPhones hold a commanding 59.1% market share compared to Android's 40.2%, partly because they capture 45% of the premium market value. This makes buying a high-quality refurbished iPhone an attractive, budget-friendly way to get that premium experience without the brand-new price tag. You can check out more on Australia's mobile OS statistics to see why so many are making the switch.
The Big One: Transferring WhatsApp Chats
For years, moving your WhatsApp history from Android to iPhone was a massive headache, often pushing people toward sketchy third-party tools. Thankfully, those days are over. WhatsApp now has its own official, built-in feature to transfer your entire chat history, including all your photos, videos, and voice notes.
This is a game-changer. Losing years of conversations is a deal-breaker for most of us, and now you don't have to. The process is integrated right into the ‘Move to iOS’ app we’ve been talking about.
Before you start the main transfer, you need to prep WhatsApp on your Android phone:
- First, open WhatsApp and head to Settings > Chats > Chat backup. It's always a good idea to have a recent backup, just in case.
- Next, go to Settings > Chats > Transfer chats to iPhone (this might also be labelled "Move chats to iOS").
- Tap Start. WhatsApp will then begin preparing your chat history for the move, which might take a few minutes.
Once that’s done, you can carry on with the ‘Move to iOS’ transfer process. When you get to the "Transfer Data" screen on your new iPhone, you'll see a specific option for WhatsApp. Make sure it's selected.
After the transfer is complete, just install WhatsApp on your new iPhone from the App Store and sign in using the exact same phone number. It will automatically detect the transferred data and prompt you to restore your entire chat history. Voila!
App & Data Migration Quick Guide
To make it even clearer, here's a quick rundown of how different apps and data types are handled during the move.
| Item | Transfer Method | Key Consideration |
|---|---|---|
| Free Apps | ‘Move to iOS’ finds them on the App Store and adds them to a download queue. | Automatic for popular apps like Instagram, Spotify, etc. You'll just need to log back in. |
| Paid Apps | Manual repurchase from the Apple App Store. | Purchases are not transferable between Google Play and the App Store. |
| WhatsApp Chats | Official feature within the ‘Move to iOS’ app. | You must prepare the transfer in WhatsApp on your Android before starting the ‘Move to iOS’ process. |
| Standard SMS Messages | Included in the main ‘Move to iOS’ transfer. | This is usually a smooth process, bringing your text history over. |
| Cloud-Based Messengers | Log in to your account on the new iPhone (e.g., Telegram, Signal, Messenger). | Your chat history is stored on their servers, not your device, so it syncs automatically. |
| Contacts | Included in the main ‘Move to iOS’ transfer or via your Google account sync. | For a deeper dive, check out our guide on how to transfer contacts to a new phone. |
This table should help you anticipate what to expect for each part of your digital life, ensuring no nasty surprises when you finally boot up your new iPhone.
What About Other Messages?
So, what happens to the rest of your conversations? It really depends on the app.
- Standard SMS Messages: The good news is your regular text messages (SMS) are usually bundled into the main transfer when you use the ‘Move to iOS’ app.
- Telegram & Signal: These apps are cloud-based. This is fantastic because it means your entire chat history is stored on their servers, not on your physical phone. Just download the app on your iPhone, sign in, and all your conversations will be right there waiting for you.
- Facebook Messenger & Instagram DMs: Much like Telegram, these are tied to your account. Your message history will reappear the moment you log in on your new iPhone.
This multi-pronged approach ensures that even though you’re getting a brand new phone, you aren’t forced to start your digital conversations from scratch.
Settling into Your New iPhone
So, your data has made the leap. But the job isn't quite done yet. Think of this final stage as arranging the furniture in your new digital home—a few essential tweaks and personal touches will make your new iPhone feel truly yours from the moment you start using it.
This final checklist gets into the practicals, like getting your mobile service up and running, and the fun stuff, like customising your device to fit your habits. We’ll have you feeling like a seasoned iPhone user in no time.
Connect to Your Mobile Network
First things first, let's get you connected. With Aussie carriers like Telstra, Optus, or Vodafone, you've got two main options to get your mobile plan working on your shiny new iPhone.
- Physical SIM Card: This is the old-school, tried-and-true method. Just pop open the SIM tray using the small ejector tool that came with your iPhone (a paperclip works in a pinch). Slide the SIM card from your old Android phone into the new iPhone’s tray, and you're good to go.
- eSIM: Many newer iPhones support eSIM, which is a digital SIM that you can activate without fumbling with a physical card. It's a cleaner setup and perfect if you want to run two numbers on one phone. Activation is usually as simple as scanning a QR code from your carrier or following the prompts in their official app.
Once your SIM is active, you should see your carrier's name at the top of the screen. Make a quick call or browse a webpage on mobile data just to be sure everything is working as it should.
Personalise Your iPhone Experience
Now for the fun part: making the iPhone work for you. Unlike the sometimes rigid layouts on Android, iOS gives you some powerful ways to arrange your digital space exactly how you like it.
A great place to start is setting up Face ID or Touch ID in Settings > Face ID & Passcode. This biometric security is much quicker and more secure than tapping in a passcode every time you unlock your phone.
Next, it's time to tackle the Home Screen. Just long-press on any empty space to enter "jiggle mode." From here, you can drag your apps into folders or add widgets—those handy, glanceable windows for apps like Weather, Calendar, or Spotify. Widgets are brilliant for getting key info without having to open an app.
Pro Tip: Customise your Control Centre by heading to Settings > Control Centre. You can add shortcuts for handy tools like the Torch, Calculator, or even a remote for your Apple TV, making them accessible with a single swipe down from the top-right corner.
Final Essential Tweaks
With the main setup out of the way, a few final checks will ensure your iPhone is secure, convenient, and ready for whatever you throw at it. These are the small but crucial details that make a huge difference day-to-day.
- Set up Apple Pay: Jump into the Wallet app and add your credit or debit card. It’s an incredibly secure way to make contactless payments in stores and online.
- Review Privacy Settings: Take a minute to go to Settings > Privacy & Security. It's well worth reviewing which apps have access to things like your location, photos, and microphone.
- Master the Gestures: If you're coming from an Android phone with navigation buttons, iOS gestures might feel a bit foreign at first. Swipe up from the bottom to go home, swipe up and hold for recent apps, and swipe down from the top-right for Control Centre. You’ll get the hang of it in minutes, I promise.
- Explore iMessage and FaceTime: These are two of the best features in the Apple ecosystem. Pin your favourite conversations in Messages and give FaceTime a go with another iPhone user for crystal-clear video chats.
Once you’ve ticked these off, your switch is well and truly complete. You're joining a huge community here in Australia, where iOS holds a dominant 59.1% market share among the nation's 26.2 million active smartphone users. That popularity makes the iPhone a well-supported and familiar choice for many. To understand more about these trends, you can read the full guide on iOS vs Android in Australia. And if you ever need to start fresh, it's handy to know how to do a factory reset on an iPhone.
Common Questions About Moving to iPhone
Making the leap from Android to iPhone is a big move, and it’s completely normal to have a few questions. To help you feel confident about the switch, we’ve tackled some of the most common queries we get from people making the same transition.
Think of this as a final chat with a tech-savvy mate, making sure you’re all set for life with your new iPhone.
Will my paid apps from Android work on my iPhone?
This is probably the number one question we hear. The short answer is, unfortunately, no. The Google Play Store and Apple’s App Store are completely separate worlds—like trying to play a PlayStation game on an Xbox.
When you buy an app on Android, you’re buying a license for Google’s platform, and that license doesn’t transfer over to Apple. This means you’ll need to repurchase any paid apps or games you want to keep using. The good news? For subscription-based apps like Spotify or Netflix, you just need to download the app on your iPhone and sign in with your existing account. All your playlists and watch history will be right there waiting for you.
What’s the best way to transfer WhatsApp chats?
For years, this was the biggest nightmare for anyone switching phones. Thankfully, those days are over. WhatsApp now has an official, built-in transfer feature that works directly with Apple’s ‘Move to iOS’ app. This is easily the best and most reliable way to get it done.
We strongly advise against using third-party apps that claim to transfer your chats for a fee. They can be unreliable, pose a security risk, and might even violate WhatsApp’s terms of service. Stick with the official method—it’s the only way to ensure your years of conversations and photos move across safely.
Can I move my data after I’ve already set up my iPhone?
This is a great question, especially if you’ve picked up a refurbished iPhone that’s already been set up. Once you’re past the initial setup screens, you can’t use the ‘Move to iOS’ app anymore, as it only appears during that first "Apps & Data" stage.
But don't panic, you still have a couple of solid options.
- Go Manual: This is your best bet. As we covered earlier, you can manually bring across your most important stuff by signing into your Google Account in the iPhone's Settings for contacts, calendars, and photos.
- Reset and Start Again: If you haven’t done much with the phone yet and really want the full automated transfer, the only way is to wipe it and start over. Head to Settings > General > Transfer or Reset iPhone > Erase All Content and Settings. This will take you back to the "Hello" screen, where you can then choose the "Move Data from Android" option.
What should I do with my old Android phone?
Once your new iPhone is sorted, you'll have your old Android sitting there. Before you do anything else, the most critical step is to securely wipe all your data. A factory reset will erase all your personal information, accounts, and photos.
After it’s clean, you have a few smart and sustainable choices.
- Trade It In: This is often the easiest and most rewarding path. Marketplaces like Trade.com.au let you sell your old phone online, offering competitive prices that put cash back in your pocket. It’s a great way to soften the cost of your new iPhone.
- Sell It Privately: You could try selling it yourself online. You might get a slightly better price, but it comes with the extra hassle of creating a listing, dealing with potential buyers, and arranging shipping.
- Recycle It: If the phone is old, broken, or not worth much, responsible recycling is the best move. E-waste is a growing problem, and recycling ensures valuable materials are recovered and hazardous ones are disposed of safely. You can explore resources on where to recycle cell phones.
Ready to make the switch to a premium device without the premium price tag? At Trade.com.au, we offer a huge range of verified refurbished iPhones, all backed by a 12-month warranty. Find your perfect iPhone and join the millions of happy Aussies in the Apple ecosystem today. Explore our collection at https://www.trade.com.au.