
How to Transfer Contacts to a New Phone: The Easy Guide
Getting a new phone is a fantastic feeling, whether you’ve just unboxed the latest model or snagged a quality refurbished device from us here at Trade.com.au. But that initial buzz can fade pretty fast when you open your contacts and see... nothing. It’s a common headache, but thankfully, moving your entire address book over isn’t the painful, manual chore it used to be.
These days, the easiest way to get it done is by using a cloud service. For Apple users, that’s iCloud; for Android folks, it’s your Google Account. This method wirelessly syncs everything, making sure not a single number gets left behind.
Making Your New Phone Feel Like Home
That new phone feeling is all about possibility. But let's be real—a phone without your contacts feels like an empty house. Your contacts list is the heart of your social and professional life, and the thought of losing it or manually re-entering every number is enough to cause some serious stress.
The good news? Modern smartphones are built to make this switch as painless as possible. It doesn’t matter if you’re upgrading from an old iPhone to a new one, sticking with Android, or even jumping ship from one to the other. There’s a straightforward path for you, and you definitely don’t need to be a tech guru to figure it out.
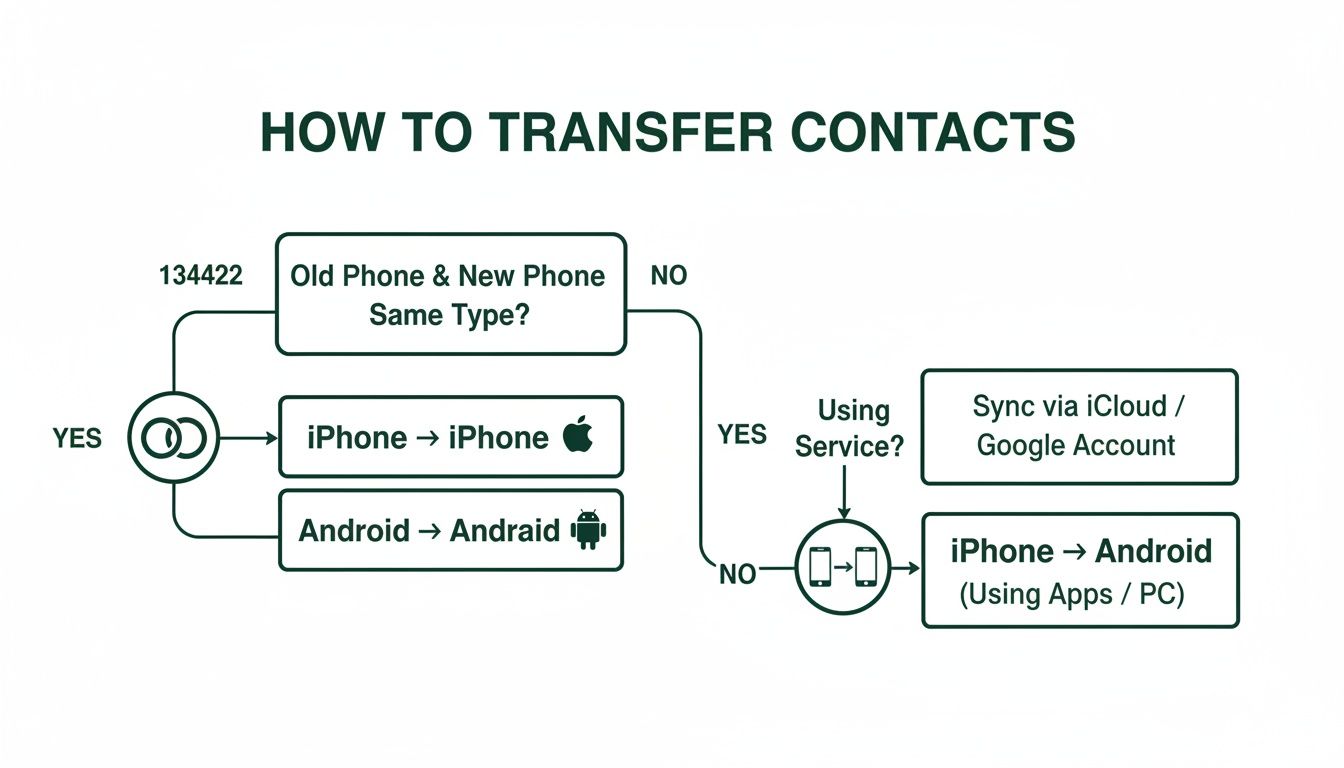
Find Your Best Contact Transfer Method
The right method really boils down to what phones you’re working with. An iPhone-to-iPhone transfer is a different beast than moving from a Samsung to a Google Pixel, or from an Android to an iPhone. The goal is always the same: get every name, number, email, and even profile picture moved over perfectly.
To help you cut through the confusion, this quick comparison table will point you in the right direction. Just find your scenario to see the best way forward.
This quick comparison helps you pick the right method based on your old and new phones. Find the most efficient way to move your contacts below.
| Transfer Scenario | Recommended Method | Difficulty | What You Need |
|---|---|---|---|
| iPhone → iPhone | iCloud Sync or Quick Start | Easy | Apple ID, Wi-Fi |
| Android → Android | Google Account Sync | Easy | Google Account, Wi-Fi |
| Android → iPhone | Move to iOS App | Easy | Both phones, Wi-Fi |
| iPhone → Android | Google Account Sync | Medium | Google Account, Wi-Fi |
| Any → Any (No Cloud) | SIM Card or vCard File | Medium | SIM tool, file manager |
As you can see, syncing through your iCloud or Google account is usually the simplest path. It’s quick, wireless, and handles all the heavy lifting for you.
What Else Should You Move?
While your contacts are priority number one, they're just one piece of the puzzle. You'll also want to bring over your photos, apps, messages, and other important data. Most of the transfer tools we'll cover, like Apple's Quick Start or Samsung's Smart Switch, are designed to move more than just contacts, making the whole setup process much smoother.
The key to a stress-free transfer is preparation. Before you do anything else, take a moment to back up your old phone completely. Think of it as your safety net. If anything goes sideways during the transfer, you’ll have a complete copy of your precious data, safe and sound.
Once your contacts are settled in their new home, you might want to sort out other features. For example, it’s a good idea to learn how to forward voicemail on any device to ensure you don’t miss any important messages while you’re getting set up.
A Quick Pre-Flight Checklist
Before you jump into the specific steps, run through these simple checks. Trust us, a few minutes of prep can save you a lot of hassle.
- Juice them up. Make sure both your old and new phones have at least 50% battery. A transfer that cuts out halfway through because of a dead battery can corrupt your data. Nobody wants that.
- Get on Wi-Fi. A stable Wi-Fi connection is your best friend here, especially for cloud-based methods. It’s way faster and more reliable than mobile data, and it won’t chew through your monthly allowance.
- Update your software. Check that both phones are running the latest version of their operating system (iOS or Android). Software updates often include fixes that make transfers run more smoothly.
With those things squared away, you’re ready to get started. Let’s make that new phone truly yours.
Syncing Contacts Between iPhones With iCloud
If you're upgrading from one iPhone to another, you've picked the easiest route by far. For Apple users in Australia, moving contacts is incredibly straightforward, all thanks to the magic of iCloud.
Think of iCloud as your personal digital vault, quietly working in the background to keep all your important info synced and safe across your devices. It’s the gold standard for a reason: it’s built-in, wireless, and makes sure every single contact detail—from phone numbers and emails to birthdays and profile photos—moves over flawlessly.
First, Check Your Old iPhone
Before you even get your hands on your shiny new refurbished iPhone, the very first thing to do is a quick check on your old device. You just need to make sure it's actively backing up your contacts to iCloud. It's usually on by default, but it never hurts to double-check and avoid any "where are my numbers?" moments later.
Here's how to confirm everything is switched on:
- Open the Settings app on your old iPhone.
- Tap on your name and Apple ID banner right at the top.
- Select iCloud from the list.
- Under the "Apps Using iCloud" section, tap Show All.
- Scroll down until you find Contacts and make sure the toggle next to it is green.
If it’s already on, great. Your phone has been keeping your contacts safely tucked away in the cloud. If it was off, just flick the switch. Your iPhone will immediately start uploading your address book, which might take a few minutes depending on your Wi-Fi speed and how many people you know.
Our Tip: While you’re in the iCloud settings, it’s a good idea to check that other essentials like Calendars, Reminders, and Notes are also toggled on. That way, you’re not just moving contacts but your whole digital life, seamlessly.
Sign In On Your New iPhone
Once you've confirmed your contacts are backed up, the hard part is officially over. Now for the fun bit – turning on your new iPhone. During the initial setup, you’ll be asked to sign in with your Apple ID. This is the same email and password you use for everything Apple, like the App Store.
This is the key moment. When you punch in your Apple ID details, your new phone connects securely to your iCloud account and starts pulling down all the information you’ve stored there. This, of course, includes your contacts, which will begin to populate your address book almost instantly.
The reality is, this iCloud method is the go-to for most Australians. In 2025, Apple's iOS is on track to hold a massive 58.92% market share in Australia's mobile scene. With well over half the country's smartphone users on iOS, syncing via iCloud is the most trusted and familiar way to get an entire contact list moved over in seconds, completely cable-free.
This automatic sync means you can just sit back and relax. In a few minutes, you’ll be able to open the Phone or Contacts app and see all your familiar names and numbers, right where they should be. For a more detailed guide on moving everything else, check out our post on how to transfer all your data from one iPhone to another.
Moving to a New Android? Your Google Account is Your Best Friend
If you're an Android user, your Google account is hands-down the easiest way to get set up on a new phone. Think of it as a digital key that unlocks all your important stuff, especially your contacts. Whether you're moving from an old Samsung to a shiny new Pixel, or any other combination of Android phones, this method is built right in. No cables, no extra apps, just pure simplicity.
The magic word here is syncing. Your old phone pushes your contact list up to your Google account in the cloud, and your new phone pulls it straight back down. It’s quick, secure, and makes sure every single number and email address comes along for the ride. It's the perfect first step when you've just unboxed a great value refurbished Android phone from Trade.com.au and want to dive in.
First, a Quick Sanity Check on Your Old Phone
Before you say a final goodbye to your old device, it's worth taking a minute to double-check that your contacts are actually being backed up. This is usually on by default, but trust us, spending 60 seconds now can save you a world of pain later. It’s like checking you have your house keys before you pull the door shut.
Here's how to make sure everything's in order on your old Android:
- Head into your Settings app.
- Scroll down and find Accounts (sometimes this is labelled "Accounts and backup" or "Users & accounts," depending on your phone).
- Tap on your main Google account.
- Look for an option like Account sync.
- You'll see a list of things Google syncs. Make sure the toggle next to Contacts is on. You should also see a timestamp showing when it last synced successfully.
For extra peace of mind, you can usually tap the three-dot menu in the top corner and hit "Sync now." This forces one last backup, ensuring even the contacts you added five minutes ago are safely in the cloud.
Getting Started on Your New Android
With your contacts safely tucked away in your Google account, the rest is a breeze. As you go through the initial setup on your new phone, it will prompt you to connect to Wi-Fi and then ask you to sign in with your Google account.
This is the most important part of the whole process. Be sure to use the exact same Google login details you used on your old phone.
Once you’re signed in, your new phone will immediately start pulling down all your data from Google's servers. This isn't just limited to your contacts; your calendar, apps, and other settings will also start appearing. Give it a few minutes, open the Contacts app, and you should see your entire address book populating just as you left it.
This cloud-based method is a lifesaver for millions of Aussies. With Australia's smartphone market reaching a massive 30.3 million units in 2024, the Android ecosystem is a huge part of the picture. For the 44% of Australian smartphone users who are on Android, simply toggling on sync means a stress-free upgrade every time. You can read more about Australia's mobile trends over at imarcgroup.com.
Pro Tip: Don't panic if your contacts don't show up instantly. If you have a massive list, it can sometimes take a few extra minutes for the sync to finish. You can always check its progress on your new phone by going to the same
Settings > Accounts > Googlemenu.
Honestly, for any Android-to-Android move, this is the most reliable way to go. It completely removes the technical headache and lets you get straight to enjoying your new phone.
Moving Contacts Between iPhone and Android
I remember a time when swapping from an iPhone to an Android (or the other way around) felt like a huge mission. It used to be a real headache, with the genuine fear that you’d lose your entire contact list in the process.
Thankfully, that digital wall between the two worlds has pretty much crumbled. Today, there are much simpler ways to get the job done. The most reliable method is using your Google account as a central hub. It acts as the perfect bridge, holding all your contacts safely in one place, ready for whatever device you use next.
Let’s break down exactly how this works, whether you’re joining Team Android or making the move to Apple.
Moving From an iPhone to a New Android Device
So, you’re leaving iOS behind for a shiny new or refurbished Android. Great choice! Your Google account is going to be your best friend here. The whole process is basically a two-step dance: first, you get your contacts out of Apple’s world (iCloud), and second, you bring them into Google’s. It sounds a bit technical, but we promise it’s surprisingly straightforward.
You'll need to start by exporting your contacts from iCloud, and for this part, you'll need a computer, as it can't be done directly from the iPhone.
- First, open a web browser and head over to iCloud.com.
- Log in with your Apple ID and password.
- Click on the Contacts icon.
- Once your list loads, look for the small gear icon in the bottom-left corner and click it, then choose Select All.
- Click that same gear icon again and this time, select Export vCard.
This downloads a single file with a .vcf extension to your computer. Think of this vCard file as a universal digital address book containing every single contact you had stored in iCloud. It's a standard format that nearly every platform recognises, which makes it perfect for this cross-platform jump.
Now, you just need to hand that file over to Google.
- In the same web browser, go to contacts.google.com.
- Sign in with the same Google account you plan to use on your new Android phone.
- On the menu to the left, click Import.
- A window will pop up. Click Select file and find that
.vcffile you just downloaded from iCloud. - Click Import, and watch as Google pulls all your contacts into your account.
That’s it! The final step is to sign into that same Google account when you set up your new Android phone. Your contacts will automatically sync over, and you’ll find them waiting for you in your address book.
Moving From an Android to a New iPhone
Making the jump from Android to iPhone? Apple knows this is a common move and has built a dedicated tool just for people like you. It’s a free app called Move to iOS, and its whole purpose is to make this transition as painless as possible by directly transferring your data.
This is by far the most direct way to get your contacts, message history, photos, and more from your old Android to your new iPhone.
One crucial thing to remember: you have to do this during the initial setup of your new iPhone. If you’ve already gone through the setup, you’ll need to reset the phone and start again. You can do this by going to Settings > General > Transfer or Reset iPhone > Erase All Content and Settings.
Here’s how to use the app:
- On your Android phone, find and download the Move to iOS app from the Google Play Store.
- Start setting up your new iPhone. When you reach the "Apps & Data" screen, make sure you choose Move Data from Android.
- Your iPhone will then show a ten-digit or six-digit code on its screen.
- Open the Move to iOS app on your Android phone, agree to the terms, and pop in the code from your iPhone.
- Your Android will then connect to your iPhone over a private Wi-Fi network it creates. You can then choose what you want to bring across—just make sure Contacts is ticked.
The app will securely transfer everything you selected. Once it's done, you can finish setting up your iPhone, and you’ll find all your contacts ready and waiting for you.
Our Takeaway: The Move to iOS app is fantastic for a one-time switch, but we always recommend getting into the habit of syncing your Android contacts with your Google account anyway. It acts as a constant backup and makes any future phone switches—regardless of the brand—incredibly simple.
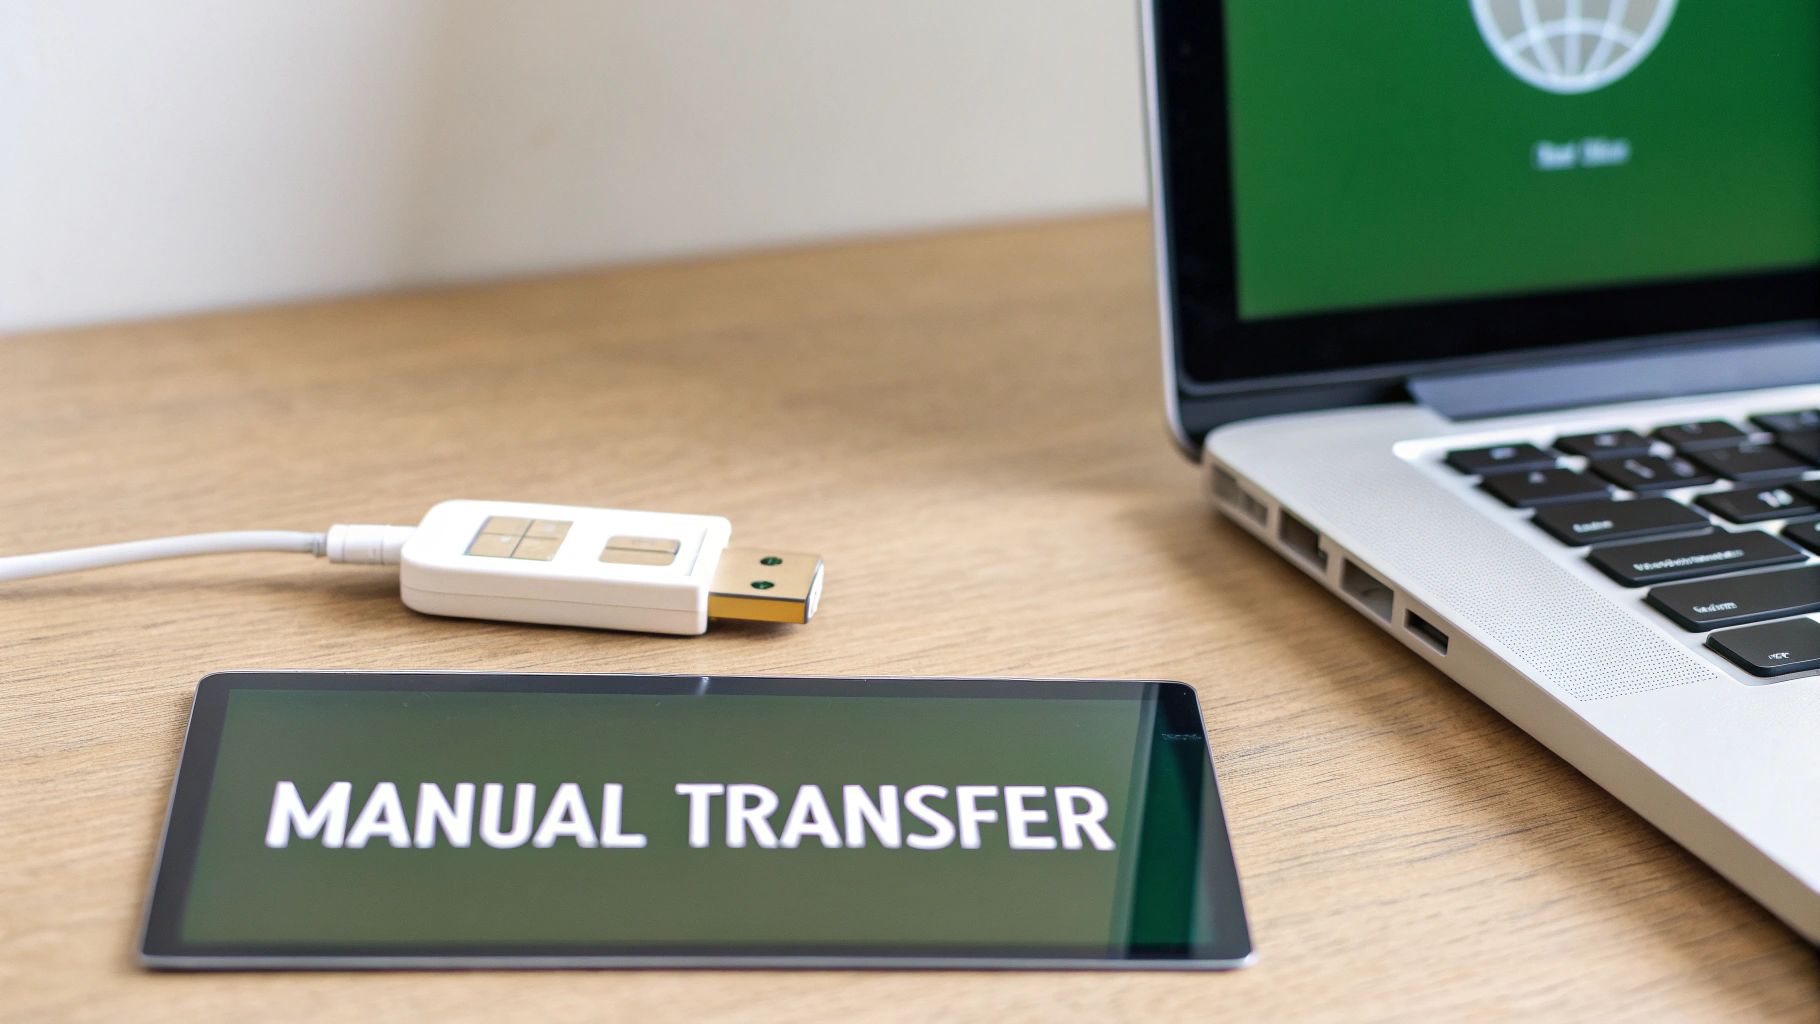
Manual and Offline Transfer Methods
Cloud syncing with iCloud or Google is brilliant, but it's not the only way to get the job done. Sometimes you need a reliable offline solution, perhaps because your Wi-Fi is acting up, you have privacy concerns, or you just prefer a more hands-on approach.
These manual methods are excellent fallbacks, giving you direct control over your contact list without relying on an internet connection. They’re the old-school, dependable tools in your tech toolkit.
Using a vCard File for Universal Transfer
The most versatile offline method involves creating a vCard (.vcf) file. Think of it as a digital business card that holds your entire address book. It’s a universal format that nearly every phone, email client, and operating system can understand, making it perfect for moving contacts anywhere.
First, you'll need to export your contacts from your old phone. The steps vary slightly depending on your device, but you’ll typically find the option in your Contacts app settings under an "Import/Export" menu.
Once you’ve created the .vcf file, you have a few ways to get it to your new phone:
- Bluetooth: The most direct wireless offline method. Just pair your two phones and send the file across.
- Email: Attach the file to an email and send it to yourself. Open the email on your new phone and tap the attachment to import.
- Direct Cable: If you have a USB-C or Lightning cable and an adapter, you can connect the phones and transfer the file directly.
This method gives you a tangible backup of your address book that you can save on a computer or USB stick for future use, which is a fantastic safety net.
Leveraging Manufacturer-Specific Tools
Many phone manufacturers offer their own free software designed to make switching to their devices as easy as possible. These apps often go beyond just contacts, moving photos, messages, call logs, and even app data. They are incredibly powerful, especially if you're staying within the same brand family.
A prime example is Samsung Smart Switch. This tool can transfer a huge amount of data between Galaxy devices, or from other Androids and even iPhones to a new Samsung. It works wirelessly or with a cable, giving you plenty of flexibility.
Similarly, other brands like Google and Motorola have their own transfer tools that pop up during the initial phone setup. If you’re getting a new phone, it's always worth checking if the manufacturer has a dedicated app—it can save you a lot of time and hassle.
Smart Switch is a game-changer for Samsung users. It doesn't just copy your contacts; it can mirror your old phone's home screen layout on your new device, making the transition feel incredibly seamless.
What About the SIM Card Method?
You might remember moving contacts by saving them to your SIM card back in the day. While this method technically still works, it has some significant limitations in the modern era.
A SIM card can typically only store a small number of contacts—often around 200-250. More importantly, it can only save basic information like a name and one phone number. All the rich data you’ve collected, such as multiple phone numbers, email addresses, physical addresses, and profile pictures, will be lost in the process.
While not ideal for a full transfer, using your SIM card can be a quick and dirty way to move a handful of essential contacts in an emergency. Think of it as a last resort rather than your primary strategy. For a more detailed look at wireless transfers, you can learn more about how to transfer contacts from one Samsung to another via Bluetooth in Australia in our dedicated guide.
Troubleshooting Common Transfer Problems
Even with the best-laid plans, technology can have a mind of its own. If you’ve followed all the steps to get your contacts onto a new phone but hit a snag, don't stress. Most issues are pretty common and, thankfully, completely fixable with a bit of know-how.
Whether you're seeing duplicate entries cluttering up your address book or finding contacts with missing details, we’ll walk you through the solutions to get your list looking clean and complete.
Dealing With Duplicate Contacts
Seeing double in your contacts list is probably one of the most frequent post-transfer annoyances we come across. It usually happens when you’ve synced from multiple sources at once—like pulling from a Google account and an old SIM card—or if a previous sync didn't quite finish properly.
Luckily, both Google and Apple have some clever built-in tools to help you tidy this up.
- For Android/Google users: The easiest way is to jump on a computer and head to contacts.google.com. Look for the "Merge & fix" option in the menu on the left. Google is smart enough to find all the duplicate entries and will let you merge them with a single click.
- For iPhone/iCloud users: If you're running iOS 16 or newer, the Contacts app itself is designed to detect duplicates automatically. If it finds any, you’ll see a "Duplicates Found" banner pop up right at the top of your list. Just tap it to review and merge them effortlessly.
This simple cleanup can make a world of difference to how usable your address book feels.
A common cause for duplicates is having contacts saved in different places on your old phone—some on the device, some on the SIM, and some in the cloud. Merging them into one cloud account before you transfer is the best preventative step.
When Contact Details Go Missing
What happens when the transfer seems to work, but it’s incomplete? You might find contacts that are just a name and a number, but their photo, email address, or the little notes you added are gone. This is almost always because the data wasn't fully synced to the cloud from your original device.
The fix is to go back to your old phone. Make sure it's connected to a stable Wi-Fi network and then manually trigger one last sync.
-
On an iPhone: Head into
Settings > [Your Name] > iCloudand double-check that the Contacts toggle is switched on. A good trick is to toggle it off and then on again, which usually prompts a fresh sync to the cloud. Our guide on how to properly back up your data on iCloud in Australia covers this in more detail. -
On an Android: Go to
Settings > Accounts > Googleand select your account. From there, tap "Account sync" and then hit the three-dot menu to select "Sync now."
Once you're confident the old phone has finished syncing, check your new device again. The missing details should start to filter through as it pulls the newly updated information from the cloud.
Now that your contacts are sorted, you can truly start enjoying your new device. If you're looking for your next upgrade, explore the range of certified refurbished tech at Trade.com.au. Get premium devices at a fraction of the price, all backed by a 12-month warranty. Find your next phone today!