
How to Securely Erase an iPhone Before Selling It in Australia
So, you’re ready to sell or trade in your old iPhone. Fantastic! But before you do anything else, let’s pause for a moment. Wiping an iPhone is a bit like moving house—you wouldn’t just walk out and leave your photo albums and personal documents behind. The same goes for your digital life.
This guide is your friendly checklist to make sure you get it right. It helps protect your photos, messages, and personal info while ensuring the phone is completely clean and ready for its next owner. Skipping these steps can lead to lost memories or, worse, leave the phone unusable for the next person because of a stubborn Activation Lock.
Your Pre-Erase Checklist: 4 Steps Before You Wipe Your iPhone
Think of this as neatly untangling your digital identity from the device. Let's walk through it, one simple step at a time.
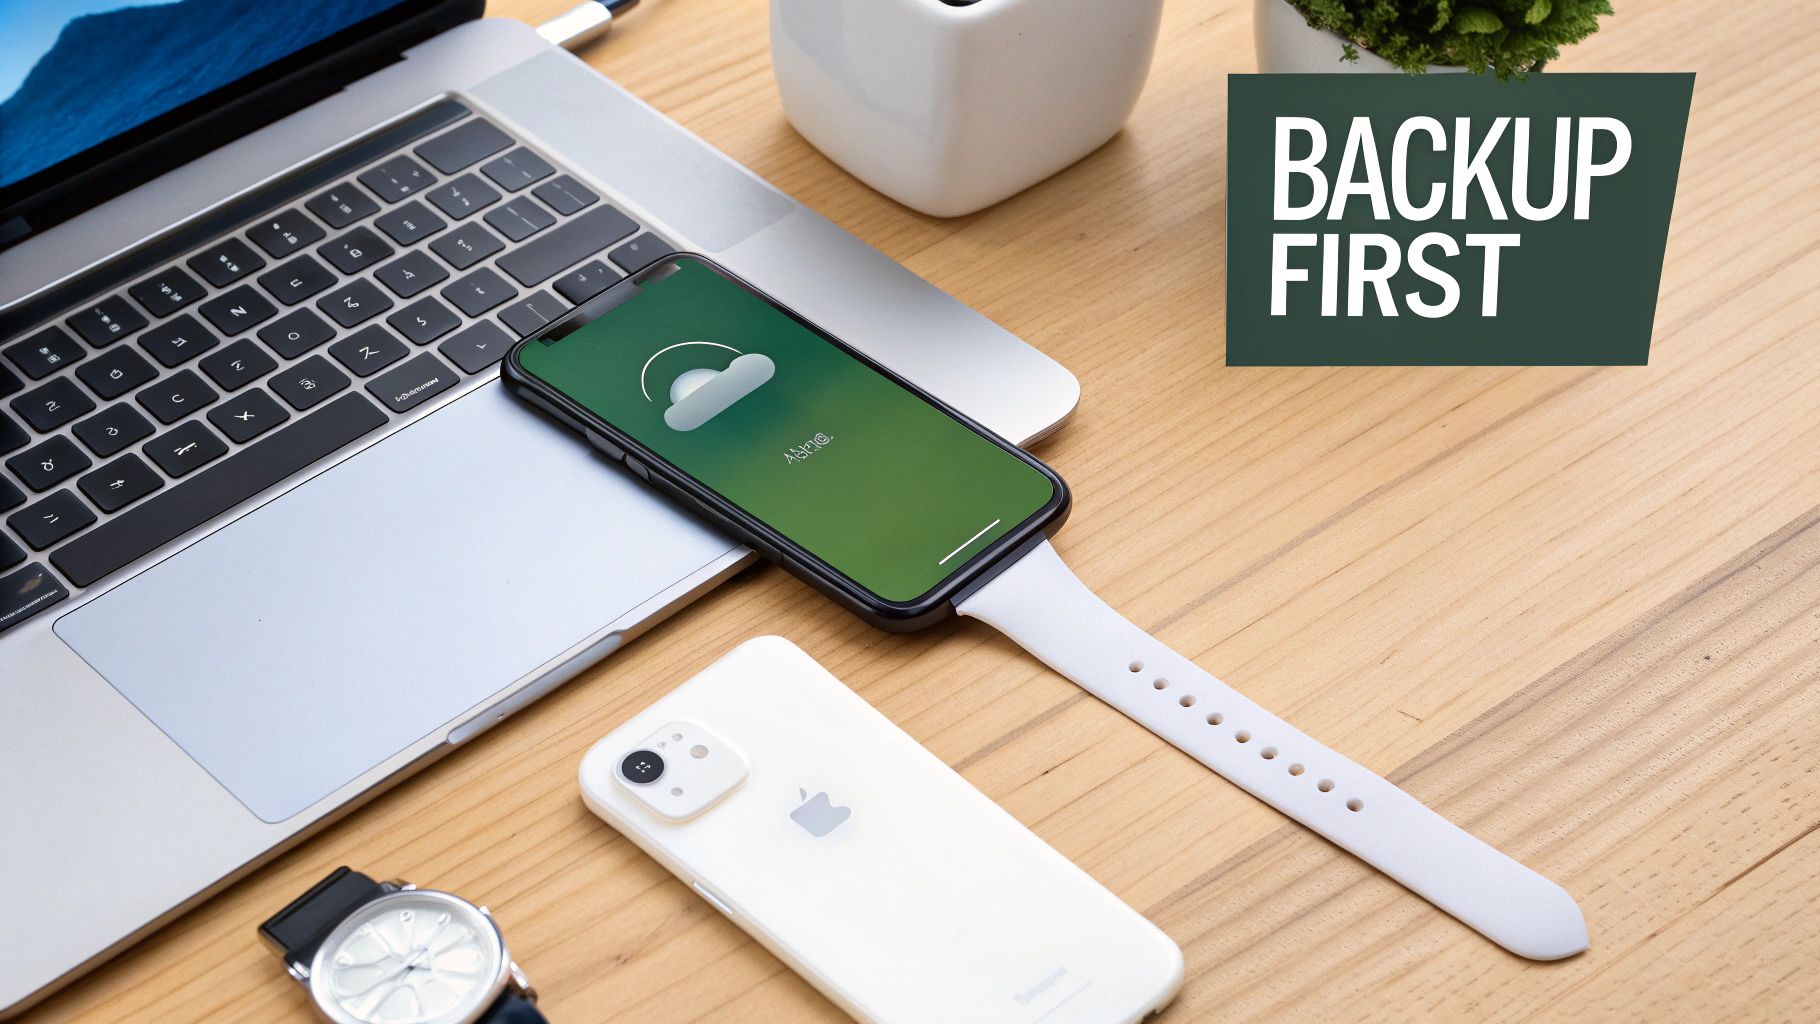
1. Create a Complete Backup
First things first: secure your data. Losing years of photos, contacts, and messages is a nightmare scenario, but it’s completely avoidable with a quick backup. You have two main options, and the best one just depends on your setup.
-
iCloud Backup: This is the easiest, most set-and-forget method. Just connect your iPhone to Wi-Fi, plug it into a charger, and head to
Settings > [Your Name] > iCloud > iCloud Backup. If it’s not already on, flick the switch and tap “Back Up Now” to get it done. - Computer Backup: If you're low on iCloud space or just prefer having a local copy on your computer, this is your best bet. Connect your iPhone to a Mac (via Finder) or a PC (using iTunes or the Apple Devices app) and follow the on-screen prompts to create a full backup.
A full backup means you can restore everything—apps, settings, photos, the lot—onto your new iPhone, making it feel like you never left. For a more detailed walkthrough, check out our guide on how to back up your data on iCloud in Australia.
2. Sign Out of Everything
With your memories safely tucked away, it’s time to sever the ties between your accounts and the iPhone. This is probably the most critical part of the entire process, especially if you plan to sell your old phone online.
Why This Matters: Signing out of your Apple ID is the only way to switch off Activation Lock. This is the anti-theft feature that ties the iPhone to your account. If you erase the phone without signing out first, the next owner will be greeted by a lock screen they can't get past, making the phone a very expensive paperweight.
To do it, go into Settings > [Your Name] and scroll right to the bottom. Hit “Sign Out” and pop in your Apple ID password when it asks. This action also disables Find My, which is the key to removing that all-important Activation Lock.
3. Unpair Your Apple Watch
If you've got an Apple Watch, you need to unpair it from your iPhone before you do the final wipe. The unpairing process automatically creates a fresh backup of your watch data on the iPhone, which then gets included in that iCloud or computer backup you just made.
Just open the Watch app on your iPhone, go to the “My Watch” tab, tap “All Watches,” and then hit the little info button (i) next to the watch you want to unpair. Select “Unpair Apple Watch” and confirm your choice. Simple! This leaves your watch ready to pair with your new iPhone without any drama.
4. Remove Your SIM Card
The last step is a physical one. Once your data is backed up and your accounts are disconnected, it's time to pop out your SIM card. While erasing the phone clears its internal memory, your SIM card still holds information tied to your mobile plan and phone number.
Grab a SIM ejector tool (or just a straightened paperclip) and push it into the small hole on the SIM tray, which is usually on the side of the iPhone. The tray will pop out. Take the card, keep it somewhere safe, and you're officially done with the prep work.
Now, your iPhone is finally ready for a complete and secure wipe.
Method 1: Erasing Your iPhone Directly from the Settings App
With your data safely backed up and your accounts signed out, it’s time for the final, most crucial step. The easiest and most direct way to wipe an iPhone clean is right there in the Settings app. Apple has built this feature to be secure and incredibly simple.
This on-device method is perfect when you have the iPhone in your hands and it’s working normally. No computer, no special software—just a few quick taps. For most people getting ready to sell or trade in their phone in Australia, this is the go-to approach.
Navigating to the Right Option
When you open Settings, you'll see a bunch of reset options, and picking the correct one is absolutely vital. Just resetting your network settings won't do the job; you need the one that nukes everything.
Here’s where to find it:
- First, open the Settings app.
- Head into General.
- Scroll right to the bottom and tap Transfer or Reset iPhone.
- Then, select Erase All Content and Settings.
This last tap is the point of no return. Your iPhone will ask for your passcode and then your Apple ID password to be absolutely sure you want to go through with it. Once you confirm, the wipe begins.
To make it even clearer, here's a quick rundown of the process.
Key Steps for Erasing from Settings
| Step | Action | Why It Matters |
|---|---|---|
| 1. Navigate | Go to Settings > General > Transfer or Reset iPhone. | This is the central hub for all reset and erase functions on your device. |
| 2. Select | Tap on "Erase All Content and Settings." | This specific option ensures everything is wiped, not just minor settings. |
| 3. Confirm | Enter your device passcode. | This is the first security check to prevent accidental erasure. |
| 4. Authenticate | Enter your Apple ID password. | This final step disables Activation Lock, making the phone usable for a new owner. |
Following these steps guarantees a secure wipe, protecting your data and preparing the device for its next life.
Understanding the Difference Between Reset and Erase
It’s easy to get confused by the similar-sounding options, but the difference is huge. Think of a "reset" as tidying up a room, while a full "erase" is like completely emptying the house before you move out.
-
Reset Options: These are for troubleshooting. You can reset network settings, your keyboard dictionary, or home screen layout without losing important data like photos and apps. They’re great for fixing glitches but do nothing to protect your privacy for a sale.
-
Erase All Content and Settings: This is the big one. It deletes everything—photos, messages, apps, and accounts. The iPhone will restart to the "Hello" screen, just like it was when you first took it out of the box.
Choosing the wrong option could mean you hand over a phone still full of personal information. Always double-check you’re hitting "Erase All Content and Settings." For a more detailed guide, there are plenty of resources that show you how to reset an iPhone to factory settings and cover all the essentials.
Why This Built-in Method Is So Secure
This isn't just a simple delete. When you use this function, you're actually destroying the encryption keys that make your data readable. Without those keys, the jumble of code left behind is completely meaningless and can't be recovered. It’s like locking a vault and then melting the only key.
Once the process finishes, which usually only takes a few minutes, the iPhone will restart to the initial setup screen. At this point, you're done. The device is completely clean, free of your digital footprint, and ready to be passed on safely.
Method 2: Using Find My for a Remote iPhone Erase
What happens when your iPhone is no longer in your hands? Whether it's been lost, stolen, or you've simply forgotten to wipe it before sending it off for a trade-in, the thought of your personal data out in the wild is a massive worry.
Thankfully, Apple gives you a digital lifeline for these exact situations. It’s called Find My, and it’s a powerful tool that lets you erase an iPhone from literally anywhere in the world, as long as it can connect to the internet.
You can access it through iCloud.com on any web browser or via the Find My app on another one of your Apple devices, like an iPad or Mac. It’s designed specifically for these high-stress moments, putting you back in control of your data even when the phone is long gone.
How a Remote Erase Command Works
Kicking off a remote erase is surprisingly simple. Once you're logged into your iCloud account and have opened Find My, you'll see a map showing where your devices are. Just select the iPhone you need to wipe, and you'll get a few options, including "Erase This Device."
When you confirm the command, a signal is sent from Apple's servers. The very next time your iPhone connects to the internet—whether through Wi-Fi or mobile data—it will receive that instruction and start wiping itself immediately. All your content and settings will be completely deleted, returning it to factory state, just as if you'd done it from the Settings app yourself.
This is a critical safeguard for your personal information. In Australia, data privacy is a huge deal, so having the ability to remotely secure your device is more important than ever. With so many people worried about scams and data misuse, features like Find My offer genuine peace of mind.
What If the iPhone Is Offline?
This is a common question: what if the phone is turned off or isn't connected to the internet? Does the erase command just disappear into the ether? Absolutely not.
Apple’s system is built for this exact scenario. The erase command you send doesn't just vanish; it remains pending. It will sit patiently on Apple's servers, just waiting for the device to pop back online. The second that iPhone connects to a network, that pending command is executed.
Key Takeaway: A remote erase command doesn't expire. It stays active until the target device connects to the internet and confirms the wipe, ensuring your data is protected no matter how long it takes.
Finalising the Process After the Wipe
Once you get a notification confirming the iPhone has been erased, there’s one last thing to do, especially if you don't expect to ever see the device again. You need to remove it from your Apple ID account.
This final step is important for two reasons:
- It removes Activation Lock: This makes the device usable for someone else if it's ever found. This might seem odd for a stolen phone, but it's a crucial step if you've sold it and forgot to wipe it first.
- It cleans up your device list: Keeping your list of associated devices tidy makes managing your Apple account simpler and more secure down the line.
To finish the job, head back into Find My on iCloud.com, select the now-erased iPhone from your device list, and click "Remove from Account."
For a deeper dive into this, check out our guide on how to properly remove iCloud from an iPhone. The remote erase function really is an incredibly powerful tool, turning a potential data disaster into a completely manageable situation.
Method 3: Wiping Your iPhone with a Mac or PC
Sometimes, the built-in erase function in your iPhone’s Settings just doesn’t cut it. Maybe your iPhone is stuck on the Apple logo, completely disabled after one too many wrong passcode attempts, or you’re just the type who needs absolute certainty that every last bit of data is gone.
For these situations, performing a full restore using a Mac or PC is the gold standard. This method goes way beyond a simple on-device erase; it completely wipes your iPhone and then installs a fresh, clean version of iOS from scratch. It’s the most thorough way to return an iPhone to its original factory state.
Think of it as the difference between tidying a room and a full renovation. The on-device erase cleans the house, but a computer restore rebuilds it from the ground up.
When a Computer Restore Is Your Best Bet
This method isn't just for the extra-cautious; it's a powerful troubleshooting tool for some seriously frustrating scenarios. You’ll want to reach for your computer when:
- Your iPhone is disabled: If you see the dreaded "iPhone is disabled, try again in X minutes" (or worse, "connect to iTunes"), a computer restore is your only way back in.
- You've forgotten the passcode: There's no way to bypass a forgotten passcode without wiping the device, and a computer is the only tool for the job.
- The software is seriously glitchy: If your iPhone is constantly crashing, freezing, or just acting strange, a fresh iOS installation can often solve deep-rooted software problems that a simple erase won't touch.
- You're preparing a device for a business: For small businesses in Australia upgrading their team's devices, a computer restore provides an audit-proof level of data destruction before redeploying or selling.
With Australia's refurbished phone market growing, erasing iPhones properly before a trade-in has become a critical step for many of our customers at Trade.com.au. Whether you're in Sydney, Melbourne, or Brisbane, a complete wipe ensures no leftover data from previous owners, preventing potential privacy breaches. You can learn more about Australian smartphone trends to see just how active this market is.
This visual guide can help you quickly decide whether a remote erase or an on-device erase is the right path for your situation.
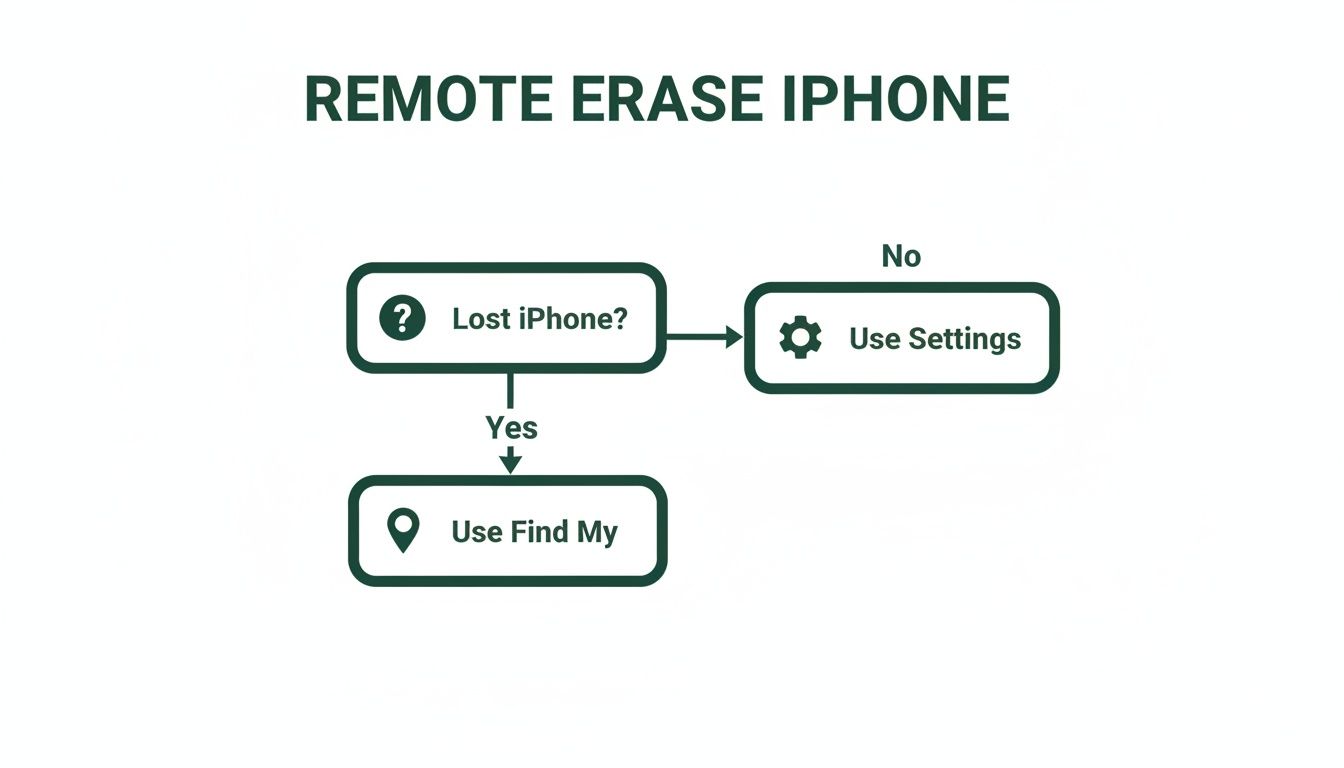
As the flowchart shows, the right method often comes down to one simple question: do you physically have the iPhone with you?
Connecting to Your Mac or PC
The process is slightly different depending on your computer's operating system, but the end result is the same: a completely factory-fresh iPhone.
On a Mac (macOS Catalina or newer)
Modern Macs have this functionality built right into Finder, which makes things nice and simple.
- Connect your iPhone to your Mac with a USB cable.
- Open Finder and look for your iPhone in the sidebar under "Locations."
- If it's your first time connecting, you may need to tap "Trust" on your iPhone and enter your passcode.
- In the General tab, just click "Restore iPhone..." and follow the on-screen instructions.
On a PC or Older Mac (macOS Mojave or earlier)
For Windows PCs or older Macs, you'll need to use Apple's software—either the newer Apple Devices app or the classic iTunes.
- Open iTunes or the Apple Devices app on your computer.
- Connect your iPhone with a USB cable.
- Click the small iPhone icon that appears near the top-left of the window.
- In the Summary panel, click "Restore iPhone..." and confirm your choice.
Your computer will then download the latest version of iOS directly from Apple's servers and install it onto your iPhone. This can take a while depending on your internet connection, so now’s a good time to grab a coffee.
Pro Tip: If your iPhone is disabled or won't turn on properly, you might need to put it into Recovery Mode first. This involves pressing a specific sequence of buttons while connecting it to the computer, which forces the device to accept the restore process.
Once the restore is finished, the iPhone will restart to the "Hello" setup screen, exactly like a brand-new device. You now have the ultimate peace of mind that your data is gone for good and the software is as clean as it gets.
Final Steps for a Successful Trade-In
You’ve done the hard part—your iPhone is now a clean slate, completely free of your personal data. But before you seal the box and send it off, a few final touches can make a surprising difference to its trade-in value.
Think of it like preparing a car for sale; a quick clean and polish can seriously boost the final offer you receive. Taking these extra few minutes not only helps you get the best possible price but also makes sure the whole process is smooth and hassle-free for everyone involved.
Giving Your iPhone a Physical Clean
First impressions really do count. A device that looks well cared for is always going to be valued higher than one covered in fingerprints, smudges, and dust. The good news is you don't need any fancy equipment for this; a few common household items will get the job done perfectly.
- Grab a soft, lint-free cloth: A microfibre cloth, like the one you'd use for your glasses, is ideal. Steer clear of paper towels or anything abrasive that could leave tiny scratches on the screen.
- Wipe it down gently: Lightly dampen the cloth with a tiny bit of water or an approved alcohol-based screen cleaner. Make sure you don't let any moisture seep into the ports.
- Clean out the nooks and crannies: Pay close attention to the speaker grilles, charging port, and the edges around the screen where grime loves to build up. A soft-bristled brush or even a wooden toothpick can gently dislodge any trapped debris.
Important Tip: Never, ever spray cleaning solutions directly onto your iPhone. This can damage the special oleophobic (fingerprint-resistant) coating on the screen and potentially harm the components inside. Always apply the cleaner to your cloth first.
This simple clean-up takes just a couple of minutes but instantly improves the cosmetic appearance of your phone. It sends a clear signal to the trade-in service that it’s been well looked after.
Gathering Original Accessories
Do you still have the original box tucked away in a cupboard? What about the charging cable or that little SIM ejector tool that came with it? While it's not always a deal-breaker, including the original accessories can sometimes increase your trade-in quote.
Have a quick look around for these items:
- The original box your iPhone came in.
- The original Lightning or USB-C charging cable.
- Any manuals or paperwork that were included.
At the very least, having these items shows a level of care that can be a positive factor in your device’s final assessment. It also makes the device easier for us to process and get ready for its next life. If you want more details on preparing for a sale, you might find our guide on how to trade in a phone in Australia helpful.
Documenting the Phone’s Condition
Before you package your iPhone up, take a moment to be your own quality inspector. Snapping a few clear photos of your device from all angles is a smart move. It protects you and provides a clear record of its condition before it leaves your hands.
Just lay the iPhone on a plain, well-lit surface and take a few high-quality pictures of:
- The front screen (turn it on if you can, to show the display works).
- The back of the phone.
- All four sides, paying close attention to the corners.
- Any notable scratches, scuffs, or dents.
Honesty is the best policy here. Being upfront about the phone’s condition when you get your online quote prevents any nasty surprises or re-evaluations down the track. These photos act as your personal record, ensuring a transparent and trustworthy transaction when you erase an iPhone and send it off to a service like Trade.com.au.
Common Questions About Wiping Your iPhone
Even with the best guides, it's natural to have a few questions pop up when you’re about to erase an iPhone. It feels like a big step, and you want to be absolutely sure you’re getting it right. Let's walk through some of the most common queries we hear from our Australian customers, so you can move forward with total confidence.
Does Erasing an iPhone Remove My Apple ID?
This is a critical point that trips a lot of people up. The short answer is no—simply erasing the iPhone from the Settings app does not remove your Apple ID or the Activation Lock tied to it.
You absolutely must sign out of your Apple ID before you wipe the device.
Think of it like this: wiping the phone is like clearing out all the furniture from a house you're selling. But if you don't sign the deed over to the new owner (by signing out of your Apple ID), the house is still legally yours, and they can't move in. Forgetting this step leaves Activation Lock enabled, making the iPhone completely useless to the next person.
If you’ve already wiped it, don't panic! You can still fix this remotely. Just log into your account on iCloud.com, open Find My, select the device from your list, and click "Remove from Account."
What if I Forgot My iPhone Passcode?
Getting locked out of your own phone is incredibly frustrating, but you're not out of options. If you can't remember your passcode, you won't be able to get into the Settings app to perform a standard erase.
The only way forward is to use recovery mode. This involves connecting your iPhone to a Mac or PC and using Finder (or iTunes/Apple Devices app on older machines) to restore it. This process completely wipes the device, and in doing so, it removes the forgotten passcode. It's a powerful security feature designed to protect your data if the phone is lost or stolen.
A Quick Reminder: There is absolutely no way to bypass a forgotten passcode without erasing the iPhone. This is precisely why keeping a recent backup is so important—it's your safety net for getting all your data back on a new device after the locked one is wiped.
Is a Factory Reset Truly Permanent?
For all practical purposes, yes. A factory reset is permanent and irreversible.
When you use the ‘Erase All Content and Settings’ feature, you’re not just deleting files one by one like you would on a computer. The iPhone performs what’s known as a cryptographic wipe.
All the data on your iPhone is protected by a complex encryption key stored in a secure part of the hardware. The factory reset process instantly and permanently destroys this key. Without the key, the data on the phone's storage becomes a meaningless jumble of digital noise that is impossible to access. Even advanced forensic tools can't put it back together.
For ultimate peace of mind after wiping your device, it's a good idea to know how to securely dispose of old iPhones. This ensures every step, from data removal to final handover, is handled correctly. This finality is what allows you to confidently sell, trade-in, or recycle your device, knowing your personal information is gone for good.
Ready to turn your old, securely wiped iPhone into cash? At Trade.com.au, we make it easy to trade in your devices for a great price or explore our range of certified refurbished tech. Every device comes with a 12-month warranty, giving you peace of mind and fantastic value.