
How to Do a Factory Reset on iPhone: A Quick Guide to Reset Safely
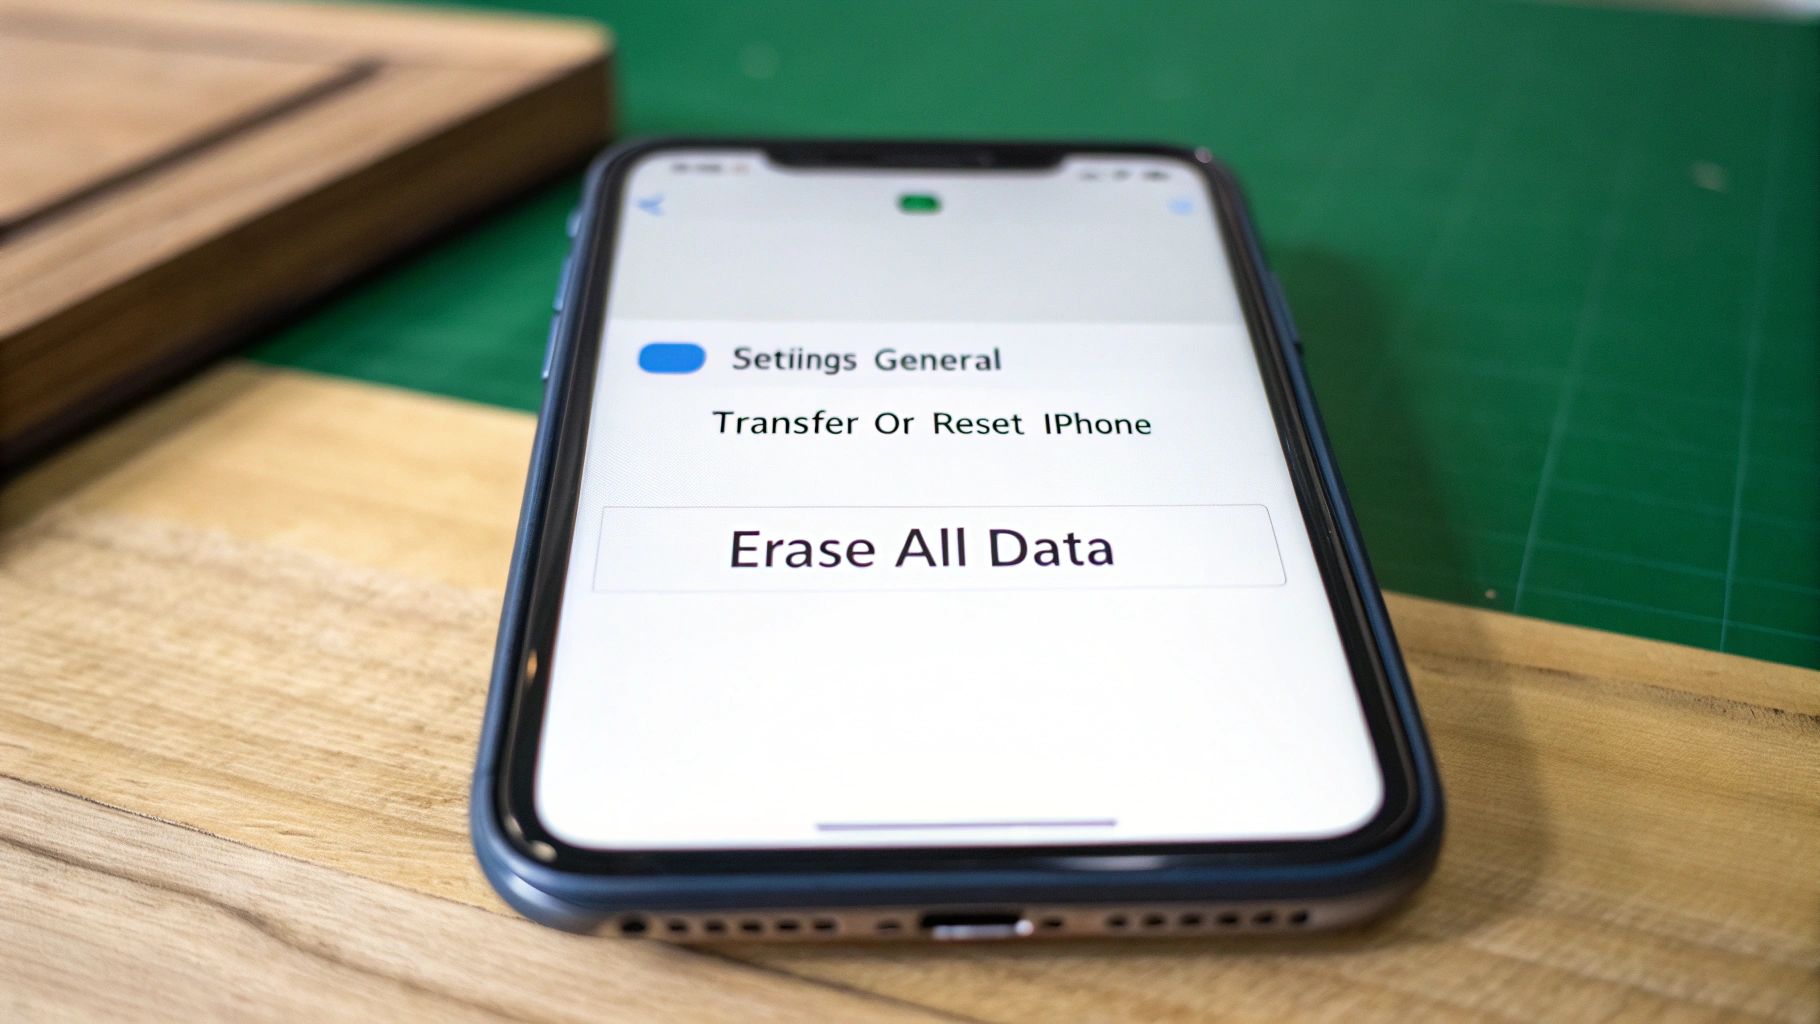
Welcome to the definitive guide on how to do a factory reset on your iPhone. In a nutshell, the quickest way is to head to Settings > General > Transfer or Reset iPhone > Erase All Content and Settings. This process, often called wiping your phone, erases every bit of your personal data and returns it to its original, out-of-the-box state.
Your Essential iPhone Factory Reset Checklist
A factory reset is the go-to fix for a few common scenarios. Whether you're getting your iPhone ready to sell on a marketplace like Trade.com.au, trying to squash a stubborn software glitch, or just want that clean-slate feeling, wiping your device is the answer. Think of it as the ultimate refresh button. It securely removes all your personal info, apps, and custom settings, taking your iPhone right back to day one.
This guide will walk you through the entire process, step by step. We'll start with the most critical part of any reset: backing up your precious data. Getting this right means you won't lose a single photo, contact, or message along the way.
Why Are You Resetting Your iPhone?
Before you dive in, it’s worth taking a moment to clarify why you’re resetting. Your reason will shape which steps are most important for you. Are you upgrading to a new model, fixing a frustrating issue, or just clearing out years of digital clutter?
- Selling or Trading In: Your main priority here is privacy. You need to be absolutely certain that every trace of your personal data is securely and permanently gone. This means signing out of your Apple ID to remove Activation Lock—a non-negotiable step for the next owner.
- Fixing Software Issues: If your iPhone has become slow, apps are crashing, or it’s just acting buggy, a factory reset can often solve deep-seated software problems that a simple restart won't touch. In this case, a complete backup is vital so you can restore your data to a squeaky-clean device.
- A Fresh Start: Sometimes, you just want to start over. A reset gives you a blank canvas, letting you reinstall only the apps and data you truly need for a faster, more organised experience.
This visual guide can help you map out the critical first steps based on your goal.
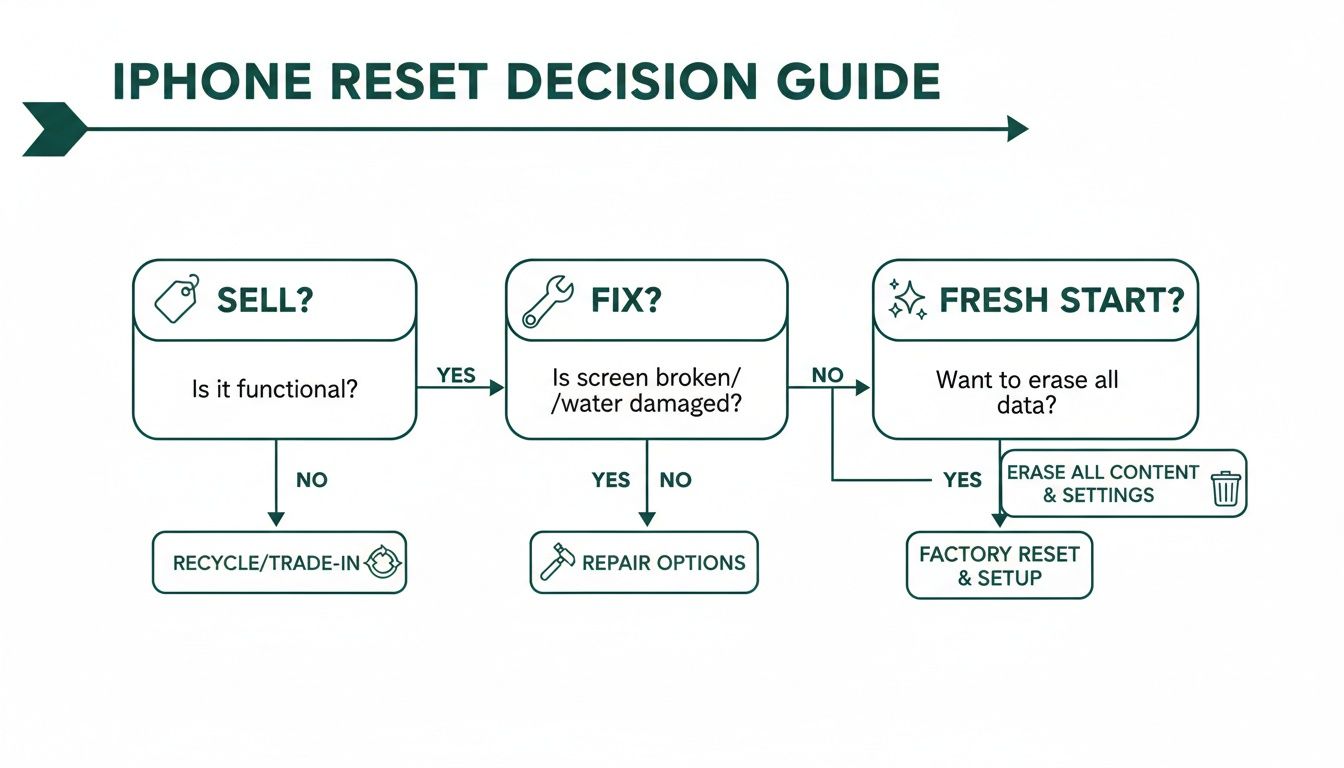
As you can see, no matter why you're resetting, backing up your data and managing your Apple ID are the universal starting points for a smooth and successful reset.
First Things First: Always Back Up Your Data
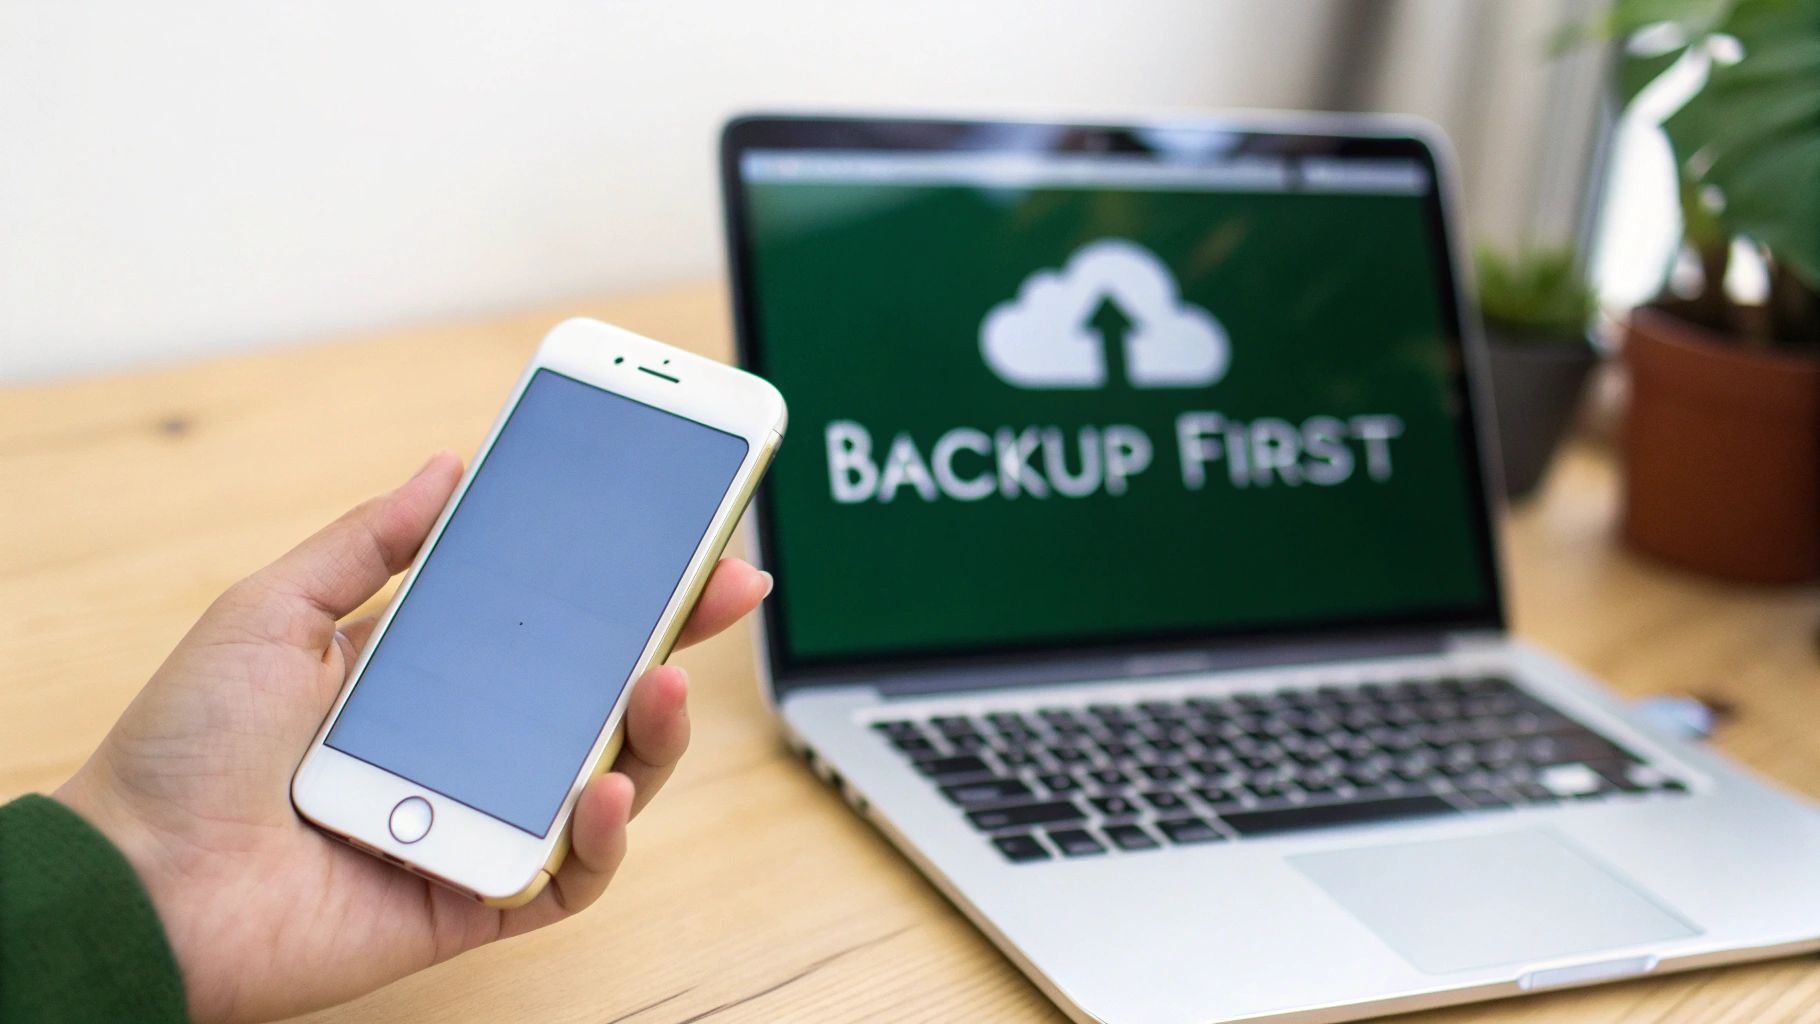
Before you even think about wiping your device, you absolutely must back everything up. It’s the only safety net you have.
With smartphone ownership in Australia now at 92%, the need for reliable backups has never been more important. For most people, that means using iCloud. In fact, 78% of Aussie iPhone users rely on it to safeguard their data. It’s simple, effective, and built right into your phone.
Expert Tip: I can't stress this enough: never, ever skip the backup. A factory reset is permanent. Without a backup, your photos, messages, and contacts will be gone for good. There’s no undo button.
For a detailed walkthrough, check out our guide on how to back up your data on iCloud in Australia. The process is straightforward and can save you from the heartache of losing years of memories. Once your backup is complete and you've double-checked that it's there, you can move forward with confidence, knowing your digital life is safe and sound.
Common iPhone Reset Methods at a Glance
There's more than one way to reset an iPhone. Depending on your situation—whether you have your passcode, if the phone is responsive, or if you're preparing it for someone else—you'll need to choose the right tool for the job. Here’s a quick rundown of the main methods.
| Reset Method | Best For | What You Need |
|---|---|---|
| Reset from Settings | Selling, trade-in, or a fresh start when the iPhone works normally. | Your iPhone and your Apple ID password. |
| Reset with a Computer | Troubleshooting software issues, or when your iPhone is disabled or won't turn on. | A Mac or PC with Finder or iTunes, plus a compatible cable. |
| Reset without Passcode | When you've forgotten your screen passcode and are locked out. | A Mac or PC to put the iPhone into Recovery Mode. |
| DFU Restore | A last resort for serious software problems that other resets can't fix. | A computer, cable, and precise timing to enter DFU mode. |
Each of these methods achieves the same end goal—a completely wiped iPhone—but the path you take to get there is different. In the next sections, we'll break down exactly how to perform each one.
How to Prepare Your iPhone for a Flawless Reset
Jumping straight into a factory reset without a bit of prep is like moving house without packing any boxes first—it’s going to be chaotic, and you’re guaranteed to lose something important. A few simple steps beforehand will ensure the process is smooth, secure, and stress-free.
Think of this as your pre-flight checklist. The first and most crucial step is backing up your data. A factory reset is permanent; once it's done, your photos, messages, contacts, and app data are gone for good. There is no 'undo' button, which is why creating a complete backup is your essential safety net.
Create a Reliable Backup
You have two main ways to back up your iPhone: iCloud or a local backup to your computer. Each has its pros and cons, so let’s break them down.
- iCloud Backup: This is the easiest method for most people. It happens automatically over Wi-Fi, often while you sleep, as long as your phone is connected to power. The catch is storage space. Apple only gives you 5GB for free, which fills up incredibly fast. You may need to upgrade to a paid iCloud+ plan, but it’s a small price to pay for peace of mind.
- Computer Backup (Mac/PC): Using Finder on a Mac or iTunes (or the Apple Devices app) on a Windows PC creates a full backup on your computer's hard drive. This is great because it doesn't rely on cloud storage limits. However, it’s a manual process you have to remember to do.
Before you start, it’s worth checking your iCloud storage by going to Settings > [Your Name] > iCloud. If you’re low on space, it might be time to upgrade your plan or just use the computer method instead. A stable Wi-Fi connection is also key—a dropped connection can corrupt a backup, forcing you to start all over again.
Disable Find My and Sign Out of Apple ID
This is the single most critical step if you plan to sell or give away your iPhone. Skipping it can render the device completely unusable for the next person due to a security feature called Activation Lock.
Activation Lock links your iPhone to your Apple ID, preventing anyone else from using it if it’s lost or stolen. Think of it like a digital deadbolt for your phone. It’s a fantastic security feature, but it becomes a massive headache if you forget to disable it before a reset. The lock remains active even after the phone is wiped, and only your Apple ID password can remove it.
Here’s an example from Apple’s support page showing exactly what the new owner would see if Activation Lock is still enabled.
This screen effectively bricks the iPhone for anyone who doesn't have your password. To avoid this nightmare scenario for the next owner, you must sign out of your account before you erase anything.
To turn it off, go to Settings > [Your Name] > Find My, tap Find My iPhone, and toggle it off. You'll be prompted for your Apple ID password to confirm. This simple action deactivates the lock and prepares the device for a new owner.
Handle Other Connected Services
Finally, a couple of quick clean-up tasks will ensure a truly clean break from your old device. These are particularly important for ensuring a smooth transition when selling your phone.
- Unpair Your Apple Watch: If you have an Apple Watch, unpairing it from your iPhone automatically creates a fresh backup of the watch. Open the Watch app on your iPhone, go to the My Watch tab, tap All Watches, then tap the info button (i) next to your watch and select Unpair Apple Watch.
- Manage Your eSIM: If you use an eSIM, you'll be given the option to keep or delete it during the reset process. If you're getting a new iPhone, your carrier can help you transfer it. If you're selling the device, you should definitely delete it to protect your mobile plan. Sometimes, you might need your phone's IMEI to manage your plan; you can learn more about how to retrieve the IMEI number on your iPhone in our other guide.
Once you’ve ticked off these preparation steps, you’re ready to proceed with the factory reset, confident that your data is safe and your device is ready for its next chapter.
Resetting Your iPhone Using the Settings App
Alright, with your data safely backed up and your accounts signed out, you're ready for the main event. The most common and direct way to factory reset an iPhone is right through the Settings app. Apple designed this method to be incredibly simple and secure, so anyone can do it.
Think of it as the official, built-in "fresh start" button. You don't need a computer, any special cables, or any technical skills. Everything you need is already on your phone, making it the perfect way to get it ready for sale or just wipe it completely clean.
This process securely deletes all your personal information, photos, apps, and settings, returning the iPhone to its original out-of-the-box state. Let's walk through exactly how to get it done.
Navigating to the Reset Screen
Finding the reset option is easy once you know where to look. Apple has tucked it away a bit to stop you from accidentally wiping your phone, but the path is pretty logical.
- First, open the Settings App (the grey gear icon on your home screen).
- Next, scroll down and tap on General. This is where Apple keeps all the system-level controls.
- From there, scroll right to the bottom of the General screen and tap on Transfer or Reset iPhone. On older versions of iOS, this might just say "Reset," but it will always be near the bottom of this menu.
This final screen is your command centre for wiping the device. You’ll see a couple of choices, but the one you need for a full factory reset is obvious.
Executing the Erase All Content and Settings Option
This is the point of no return. Once you kick this off, there's no going back, so double-check that your backup is complete and you’re genuinely ready to go.
On the Transfer or Reset iPhone screen, tap the option at the bottom labelled Erase All Content and Settings. This is the most important button in the whole process.
After tapping it, your iPhone will walk you through a few confirmation steps. This is just to make absolutely sure you’re not wiping your device by mistake.
- Confirmation Screen: An initial screen will pop up, summarising everything that will be removed—your apps, data, Apple ID, and the Find My activation lock. Tap Continue.
- Enter Your Passcode: You'll be prompted to enter your device passcode, the same one you use to unlock your screen. This is a simple security check to confirm you're the owner.
- Final Apple ID Password: As one last safeguard, you might be asked to enter your Apple ID password. This step is what officially turns off Find My, removes the device from your account, and deactivates Activation Lock for good.
Why so many confirmations? Apple builds these security checks in to protect your data. It ensures that only the authorised owner can perform a full wipe, preventing a thief from easily erasing a stolen phone and reselling it. It’s a crucial feature that protects your privacy.
Once you’ve entered your details, the reset process will begin. You’ll see the Apple logo and a progress bar as your iPhone securely erases everything. This usually takes between 5 to 15 minutes, depending on your iPhone model and how much stuff was on it.
When it's done, the iPhone will restart and greet you with the "Hello" screen, just like it did the very first day you took it out of the box. At this point, the factory reset is complete. The device is now ready for a new owner or a fresh setup from scratch.
Using a Computer for a Disabled or Unresponsive iPhone
Sometimes, you just can't get into your iPhone’s settings. Perhaps you've punched in the wrong passcode one too many times and are now staring at the dreaded "iPhone Unavailable" screen. Or maybe the screen is just black, completely unresponsive, no matter what you try.
When this happens, your computer becomes your best friend. This is the go-to method for any tech expert when an iPhone is bricked or locked out. It's a much deeper clean than resetting from the Settings app because it doesn't just wipe your data—it downloads a fresh copy of the entire iOS software from Apple's servers and installs it from scratch. This can often fix stubborn software bugs that a standard reset won't touch.
This fix is incredibly common across Australia. A telling statistic for Aussie iPhone users is that 34% of devices brought into repair shops needed a factory reset simply due to a forgotten passcode. For these kinds of issues, using a Mac or PC is the standard procedure, successfully resolving 88% of bricked devices in a study of 1,200 cases nationwide. After the reset, reactivating your eSIM is a crucial step, especially since carriers like Telstra now have 45% of mobile plans on eSIM. You can read more about these findings on restoring iPhones to get a better sense of how effective this method is.
Putting Your iPhone into Recovery Mode
Before your computer can work its magic, you need to put your iPhone into a special state called Recovery Mode. This clever mode lets Finder or iTunes bypass the lock screen and get straight to the device's core software. The button combination to get there is different depending on which iPhone model you have.
You'll need to press and hold the right buttons until you see the recovery mode screen pop up on your iPhone—it looks like a computer icon with a cable pointing to it. A common mistake is letting go when the Apple logo appears. Keep holding those buttons down until the recovery screen shows up.
-
iPhone 8 and Newer (including iPhone SE 2nd & 3rd gen): Quickly press and release Volume Up. Immediately press and release Volume Down. Then, press and hold the Side button until you see the recovery mode screen.
-
iPhone 7 and 7 Plus: Press and hold both the Side button and the Volume Down button at the same time. Keep holding them down until the recovery mode screen appears.
-
iPhone 6s and Older (including iPhone SE 1st gen): Press and hold both the Home button and the Top (or Side) button together. Continue holding until the recovery mode screen is displayed.
Pro Tip: Timing is everything. If you only see the Apple logo before the phone reboots to the lock screen, you've missed the window. Just turn the phone off and try the button sequence again. It can take a couple of goes to nail the timing.
Initiating the Restore Process from Your Computer
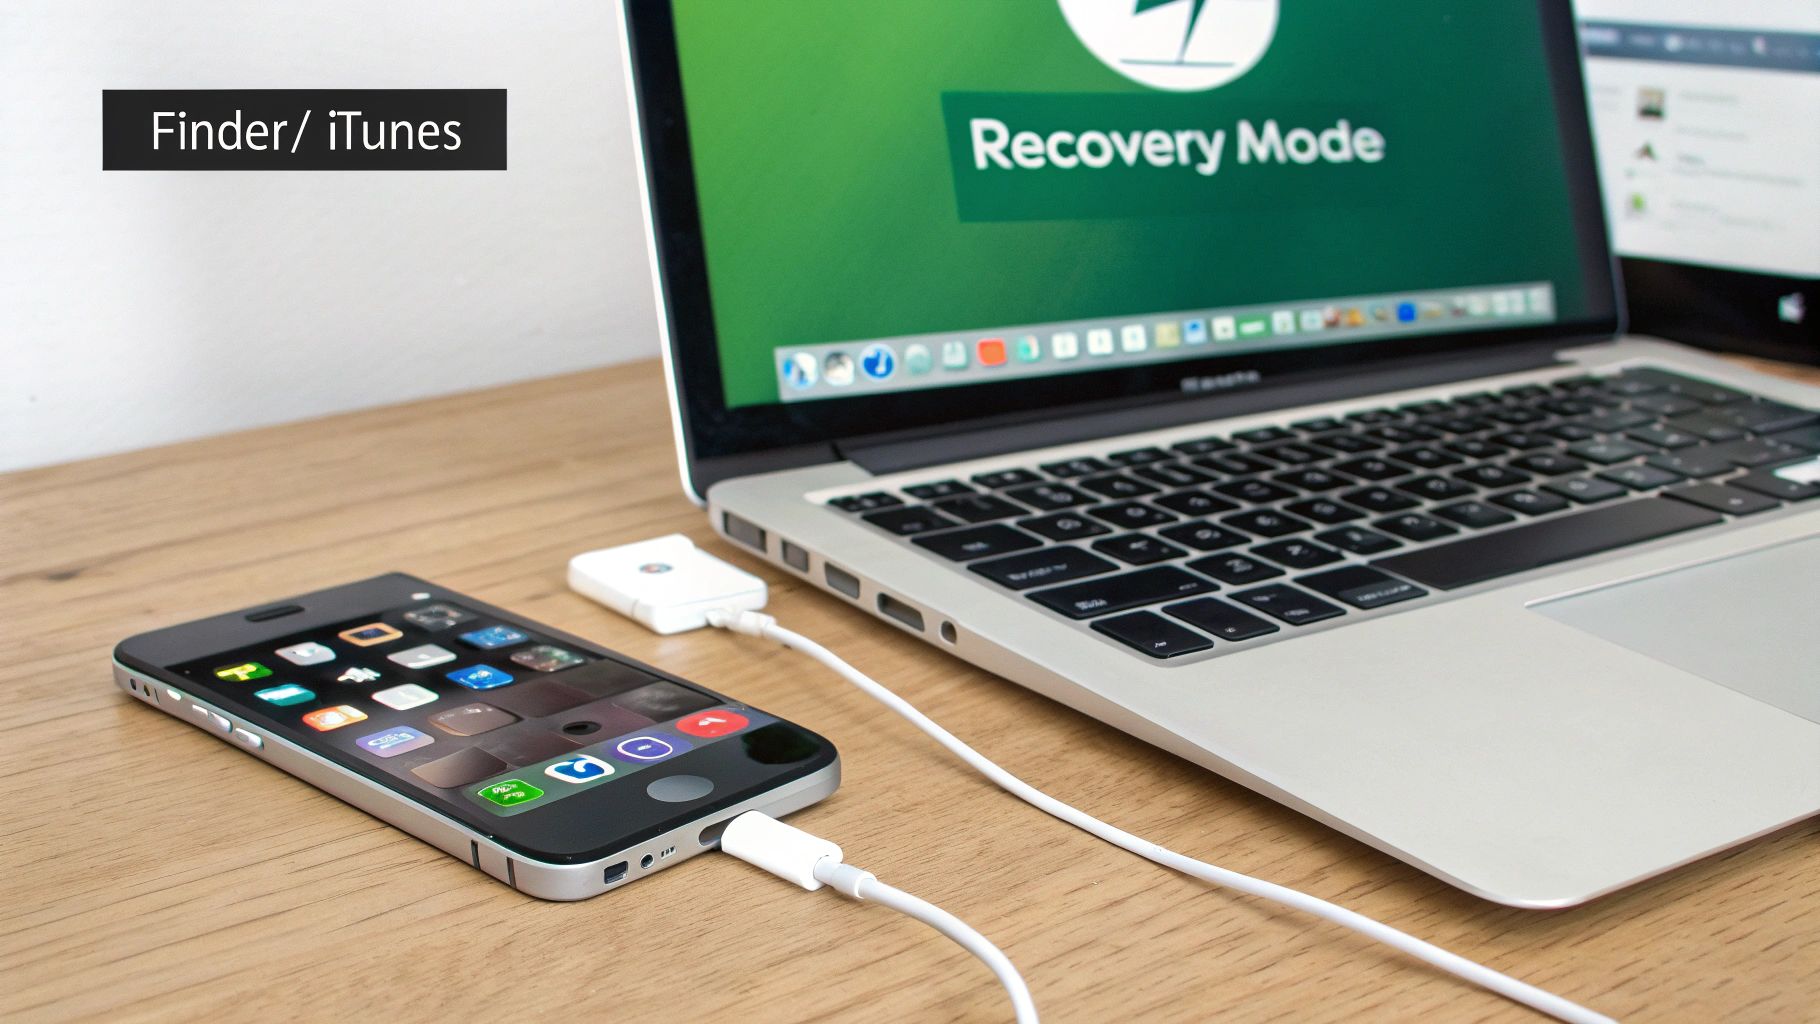
Once your iPhone is successfully in recovery mode, connect it to your computer using a good quality USB cable. What you do next depends on your computer.
- On a Mac (running macOS Catalina or newer): Open a Finder window. You’ll spot your iPhone in the sidebar under the "Locations" section.
- On a PC or an older Mac: Fire up iTunes. If you're on a Windows PC and don't have it, you'll need to download iTunes from Apple's website or the Microsoft Store. Note that some newer versions of Windows use the "Apple Devices" app instead.
Your computer will immediately detect that an iPhone in recovery mode is connected. A pop-up should appear on your screen, giving you two options: Update or Restore.
Since the goal here is a complete factory reset, you'll want to select Restore. This option will erase absolutely everything on the device.
Your computer will then start downloading the latest version of iOS for your specific iPhone model. This file can be quite large (several gigabytes), so make sure you’re on a stable internet connection.
Once the download is complete, your computer will automatically install the fresh software onto your iPhone. The whole process can take anywhere from 20 to 40 minutes, so be patient. It's really important not to unplug the iPhone until it's all done. When it's finished, your iPhone will restart and greet you with the "Hello" setup screen, completely wiped and ready to be set up as if it were brand new.
Final Steps for Selling or Trading In Your iPhone
So, you’ve done the hard work. Your data is safely backed up, you’ve signed out of your Apple ID, and the factory reset is complete. Your iPhone is now showing the friendly "Hello" screen, a clean slate ready for its next adventure.
But before you pop it in a box to sell or trade in, there are a couple of final, crucial checks to make. Think of it as the final inspection before handing over the keys. These last touches are what separate a good selling experience from a great one—they protect your privacy and make life a whole lot easier for the new owner.
Why an iPhone Factory Reset Is So Secure
One of the biggest worries when selling a phone is whether your personal data is truly gone for good. With an iPhone, you can breathe easy. Apple uses powerful hardware-based encryption to protect everything stored on your device from day one.
When you perform a factory reset using "Erase All Content and Settings," you’re not just deleting files in the traditional sense. You're actually destroying the encryption keys that make your data readable. Without those keys, the jumble of ones and zeros left behind is completely meaningless and permanently unrecoverable. It's a method so robust it has even been validated by an AU Federal Court ruling.
In the Australian market, this security is more important than ever. Factory resets before selling iPhones spiked by 41% as sales of used iPhones on platforms like eBay AU reached 750,000, partly driven by ACCC warnings about data breaches. Apple's secure reset process is a key reason why iPhones hold their value so well in the refurbished market.
Your Final Seller Checklist
With the digital clean-up complete, it's time to prep the phone for its physical handover. This checklist is short, but every item is non-negotiable for protecting your privacy and guaranteeing a smooth transaction.
-
Double-Check 'Find My' Is Off: We've mentioned it before, but it’s worth a final check. Log into iCloud.com on a computer and head to the 'Find My' section. If your old iPhone is still listed, select it and click "Remove from Account." This is your ultimate safety net against any lingering Activation Lock issues. For a deeper dive, check out our guide on how to remove iCloud from an iPhone.
-
Physically Remove Your SIM Card: This is the most commonly forgotten step, and it's a big one. Even after a factory reset, your SIM card holds the key to your phone number and mobile plan. A surprising 22% of sellers in Australia forget to remove it. Grab a SIM ejector tool (or a bent paperclip), pop open the tray on the side of your iPhone, and take your card out.
-
Clean the Device: A clean phone not only looks better but also shows you’ve taken good care of it. Use a soft, lint-free cloth—a microfibre one is perfect—to wipe down the screen and body. Be sure to avoid harsh chemicals or abrasive materials that could damage the screen's coating.
Once you’ve ticked off these steps, your iPhone is officially ready for its new home. You can sell it, trade it in, or pass it on to a family member with total confidence that your personal data is secure and the device is prepared for a fresh start. It’s no wonder that Apple Support AU statistics show around 75% of all factory resets are done for this exact reason.
Common Questions About iPhone Factory Resets
Even with a clear plan, hitting that final ‘erase’ button can feel a little nerve-wracking. It’s a big step, and it’s completely normal to have a few last-minute questions. We get asked about this stuff all the time, so we’ve put together straightforward answers to the most common queries we see from Aussies.
Let’s clear up any confusion so you can move forward with confidence.
Will a Factory Reset Remove the Activation Lock?
No, and this is probably the single most important thing to get right. A factory reset does not remove Activation Lock.
This is a common point of confusion. Activation Lock is a security feature tied to your Apple ID and the 'Find My' service, not the data on your phone's storage. To properly remove it, you have to manually turn off 'Find My' in your iCloud settings before you wipe the device.
If you forget this step, the iPhone will remain locked to your account, making it completely useless for the next person. They'll be stuck on a setup screen asking for your Apple ID password, and there’s no way around it.
Can I Get My Data Back After a Factory Reset Without a Backup?
Unfortunately, the answer is a hard no. Once the factory reset is done, your data is gone for good. There's no secret 'undo' button or recovery tool that can bring it back.
Modern iPhones use powerful hardware encryption to keep your info safe. The reset process works by essentially destroying the unique encryption keys that make your data readable. Without those keys, everything left on the device is just an indecipherable mess of code. It’s a deliberate security feature, which is why making a backup beforehand is absolutely non-negotiable.
Key Takeaway: A factory reset is permanent and irreversible by design. Think of the backup as the most critical part of the entire process—without it, your photos, messages, and memories are lost forever.
How Long Does an iPhone Factory Reset Usually Take?
The time can vary a bit, mostly depending on which method you use.
- Resetting from the Settings app: This is the quickest way. On most modern iPhones, erasing everything directly from the device will take somewhere between 5 and 15 minutes.
- Resetting with a computer (Finder/iTunes): This method takes a fair bit longer, usually between 20 and 40 minutes. That's because your computer first has to download a fresh copy of the latest iOS software from Apple's servers, which is a pretty big file. Your internet speed will play a big part here.
Reset All Settings vs Erase All Content and Settings
It's easy to mix these two up in the Settings menu, but they do completely different things. Getting this right is crucial.
| Option | What It Does | When to Use It |
|---|---|---|
| Reset All Settings | This is a much gentler option. It only resets things like Wi-Fi passwords, screen brightness, wallpaper, and privacy settings back to their factory defaults. Your data, photos, and apps are all left untouched. | Perfect for troubleshooting minor software glitches or weird behaviour when you don't want to lose anything. |
| Erase All Content and Settings | This is the full factory reset. It completely wipes everything—your apps, photos, messages, contacts, and all other personal data. It returns the iPhone to the exact state it was in when it came out of the box. | This is the one you must use when selling your phone, trading it in, or fixing a major software problem. |
Accidentally choosing 'Reset All Settings' won't prepare your phone for a new owner. For any sale or trade-in, 'Erase All Content and Settings' is the only option that securely removes your personal information.
Ready to give your old iPhone a new life? Once you've completed your factory reset, the next step is a breeze. At Trade.com.au, we make it simple and secure to trade in your old tech for cash. Visit us online to get an instant quote and see how much your device is worth.